If you crave a treat that’s both flaky and bursting with flavor, then you’ll love these Orange Cranberry Scones. With a bright citrus zing mixed with sweet, chewy cranberries, these scones are perfect for breakfast or brunch. In this article, I’ll guide you through easy steps and tips for making the best scones ever. Get ready to impress your family and friends with this delicious recipe!
Why I Love This Recipe
- Bright Flavor Profile: The combination of zesty orange and tart cranberries creates a refreshing and vibrant flavor that is perfect for any occasion.
- Quick and Easy: This recipe is simple and quick to prepare, making it an ideal choice for busy mornings or last-minute gatherings.
- Perfectly Flaky Texture: The use of cold butter ensures that the scones are light and flaky, delivering a delightful mouthfeel with every bite.
- Versatile Serving Options: These scones can be enjoyed plain, with whipped cream, or drizzled with a sweet glaze, allowing for a personalized touch to each serving.
Ingredients
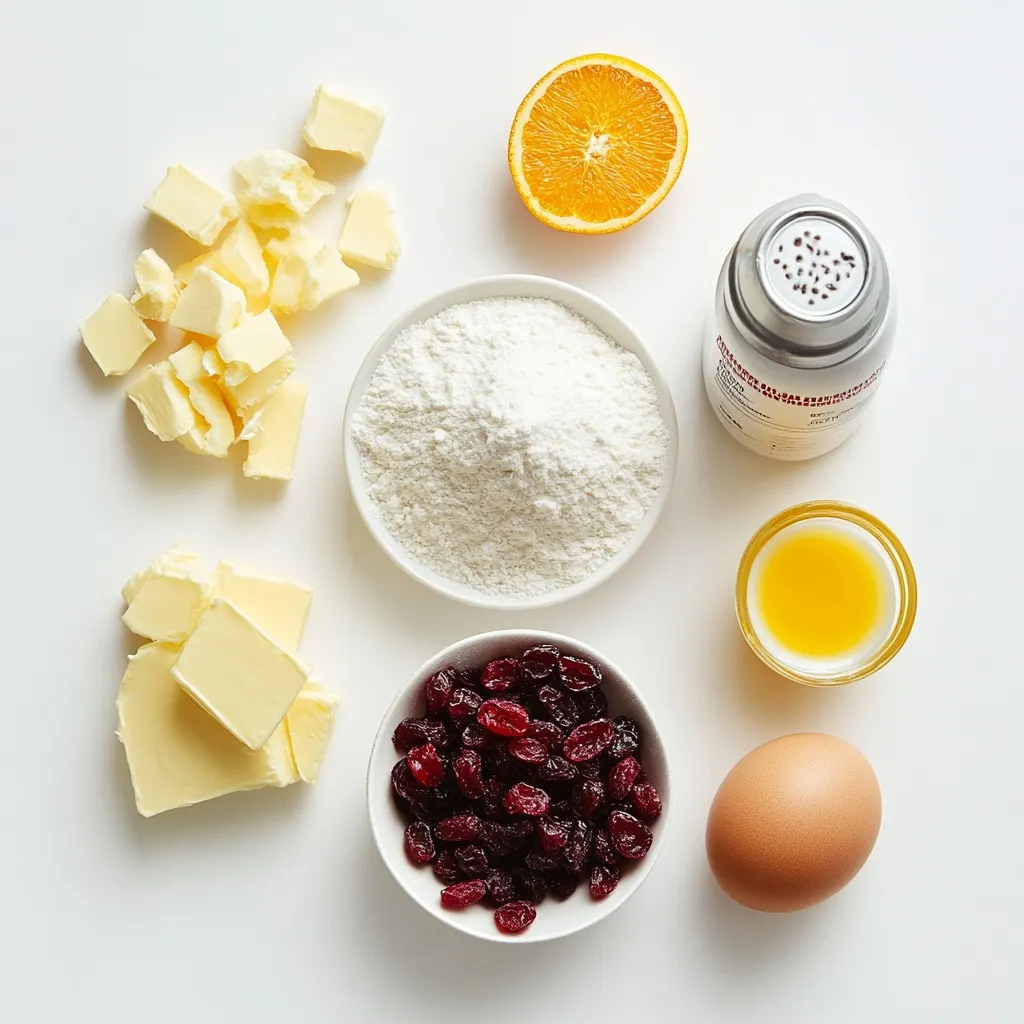
List of Ingredients
– 2 cups all-purpose flour
– 1/3 cup granulated sugar
– 1 tablespoon baking powder
– 1/2 teaspoon salt
– 1/2 cup unsalted butter, cold and cut into small cubes
– 1/2 cup dried cranberries
– Zest of 1 large orange
– 1/2 cup heavy cream
– 1 large egg
– 1 teaspoon vanilla extract
– 1/4 cup freshly squeezed orange juice
Gathering the right ingredients is key to making great orange cranberry scones. Each item plays a role in the taste and texture.
Use all-purpose flour for structure. It gives the scones their shape. The granulated sugar adds sweetness, balancing the tartness of the cranberries. Baking powder is essential for fluffiness, while salt enhances the flavors.
Cold unsalted butter is vital. It creates flaky layers when baked. The dried cranberries give a chewy texture and a pop of tartness. The zest of the orange brings bright flavor, making each bite refreshing.
For the wet ingredients, heavy cream adds richness. The large egg binds everything together, while vanilla extract adds depth. Finally, freshly squeezed orange juice enhances the citrus flavor, tying it all together.
With these ingredients on hand, you’re ready to create a delightful treat that will impress everyone.
Step-by-Step Instructions
Preparation
– Preheat the oven to 400°F (200°C)
– Line a baking sheet with parchment paper
Start by setting your oven to heat at 400°F. It’s important to preheat for the best baking result. While the oven warms up, take a baking sheet and line it with parchment paper. This helps keep the scones from sticking.
Mixing Dry Ingredients
– Whisk together flour, sugar, baking powder, and salt
In a large bowl, add the flour, sugar, baking powder, and salt. Use a whisk to mix these dry ingredients well. You want them to be light and airy. This step is key for fluffy scones.
Incorporating Butter
– Blend cubed butter into dry mixture until crumbly
Next, add cold butter cut into small cubes. Use your fingertips or a pastry cutter to blend it in. Keep mixing until the mixture looks like coarse crumbs. You should see some pea-sized bits of butter. This will make your scones flaky.
Adding Flavor
– Fold in cranberries and orange zest
Now, stir in the dried cranberries and the zest from the orange. Gently fold these in so they mix well but do not crush them. The orange zest will add a fresh, bright flavor to your scones.
Combining Wet Ingredients
– Whisk together cream, egg, vanilla, and orange juice
In a different bowl, combine the heavy cream, egg, vanilla extract, and orange juice. Whisk these together until smooth. This mixture adds moisture and richness to your scones.
Forming the Dough
– Mix wet ingredients with dry, shape dough, and cut into wedges
Pour the wet mixture into the dry ingredients. Stir gently with a spatula until just combined. It’s okay if the dough looks a bit crumbly. Lightly flour your surface and turn out the dough. Shape it into a circle about 1-inch thick. Cut this circle into 8 wedges for classic scone shapes.
Baking
– Arrange on baking sheet and bake for 15-20 minutes
Place the scone wedges onto the prepared baking sheet, leaving space between each one. Bake for 15-20 minutes. You want them to turn lightly golden on the edges. A toothpick should come out clean when inserted into the center. Enjoy the delightful aroma as they bake!
Tips & Tricks
Ensuring Flakiness
To make your scones flaky, start with cold butter. Cut the butter into small cubes and keep it chilled. This helps create pockets of steam while baking. Also, avoid overmixing the dough. Mix gently until just combined. A bit of crumbly texture is fine!
Perfect Baking
For perfect baking, watch your scones closely. Look for golden edges, which means they’re almost done. Use a toothpick to check doneness. Insert it into the center and pull it out. If it comes out clean, your scones are ready!
Presentation
Presentation matters! Serve the scones warm for the best taste. You can dust them with powdered sugar for a sweet touch. A drizzle of orange glaze adds flavor and style. A side of whipped cream can make them extra special. Enjoy these simple yet tasty tips for a great treat!
Pro Tips
- Chill Your Ingredients: For flakier scones, ensure your butter and heavy cream are very cold. This helps create that desired crumbly texture.
- Use Fresh Zest: The zest of the orange should be freshly grated for the best flavor. Dried zest can lose its aromatic oils, resulting in less vibrant scones.
- Avoid Overmixing: When combining the wet and dry ingredients, mix just until combined. Overmixing can lead to tough scones.
- Experiment with Add-ins: Feel free to customize your scones by adding nuts, chocolate chips, or even different dried fruits to enhance the flavor and texture.
Variations
Flavor Additions
You can change the dried fruits in the scones. Blueberries and cherries work great. They add a new taste and keep the scones moist. Mix in these fruits instead of cranberries for a fun twist. You’ll still get that tasty, flaky texture.
Gluten-Free Option
If you want a gluten-free version, use gluten-free all-purpose flour. This swap lets everyone enjoy these scones without worry. The texture might change a bit, but they will still be delicious. Just follow the same instructions for mixing and baking.
Sweet Twists
You can add spices to change the flavor. Try cinnamon or nutmeg for warmth. These spices can give the scones a cozy feel. Just a pinch can make a big difference in taste. Feel free to get creative and find your favorite mix!
Storage Info
Short-Term Storage
Store your orange cranberry scones in an airtight container. They stay fresh at room temperature for up to 3 days. This keeps them soft and tasty, ready for your morning coffee or afternoon snack.
Long-Term Storage
For longer storage, freeze the scones. Wrap each one tightly in plastic wrap. You can freeze them for up to 2 months. When you want to enjoy them again, just take them out and let them thaw. This method keeps their delicious flavor intact.
Reheating Suggestions
To bring back that fresh-baked taste, warm the scones. Use an oven or microwave for best results. If using an oven, preheat it to 350°F (175°C) and warm the scones for about 5-10 minutes. For the microwave, heat them in short bursts of 10-15 seconds. This makes them soft and inviting again. Enjoy!
FAQs
Can I make these scones ahead of time?
Yes, you can prepare the dough and refrigerate it before baking. This makes the scones easy to enjoy at any time. Just take the dough out, shape it, and bake when you’re ready.
How do I know when the scones are done?
They should be lightly golden at the edges and spring back when touched. A toothpick inserted in the center should come out clean. This means they are cooked all the way through.
Can I substitute ingredients?
Yes, many ingredients like flour and fruits can be substituted. For example, you can use whole wheat flour or different dried fruits. Adjust for flavor and texture to make it your own.
What drinks pair well with orange cranberry scones?
Enjoy them with tea, coffee, or a citrus-flavored beverage. These drinks complement the scone’s bright flavor perfectly. A warm cup enhances the experience of the scones’ freshness.
In summary, we explored a simple recipe for orange cranberry scones. We listed ingredients, provided step-by-step instructions, and shared tips for perfect scones. You can also make fun variations and learn storage methods. These scones are tasty, easy to make, and great for sharing. Try different fruits or flavors to make them your own. Enjoy your baking adventure and savor each bite of these delightful treat