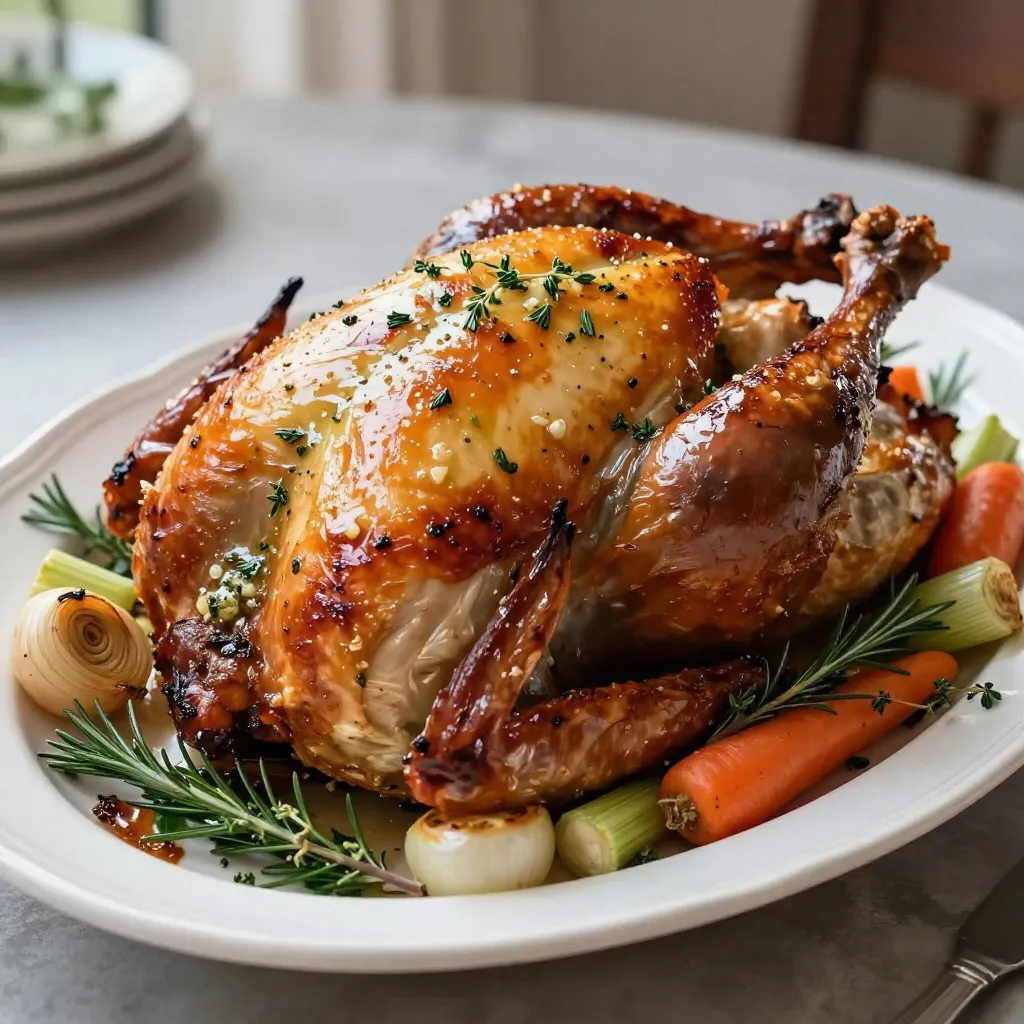
Ready to impress your guests this holiday season? My Garlic Herb Butter Roasted Turkey brings bold flavors and tender juiciness to your table! This easy recipe is packed with simple ingredients and step-by-step instructions, making it perfect for any home cook. Whether you’re a seasoned pro or a beginner, I’ll guide you through every step for a turkey that will be the star of the feast. Let’s dive into this flavorful delight!
Why I Love This Recipe
- Flavorful Herb Butter: The garlic and fresh herbs create a rich, aromatic butter that infuses the turkey with incredible flavor, making each bite truly delicious.
- Crispy Skin: By applying the herb butter under the skin, you ensure a beautifully crispy skin that contrasts perfectly with the juicy meat underneath.
- Juicy and Tender Meat: The basting process along with the resting time allows the turkey to retain its moisture, resulting in succulent and tender meat for the entire family.
- Impressive Presentation: Serving this turkey with fresh herbs and seasonal vegetables not only looks stunning but also elevates your holiday table to a new level of elegance.
Ingredients
List of Required Ingredients
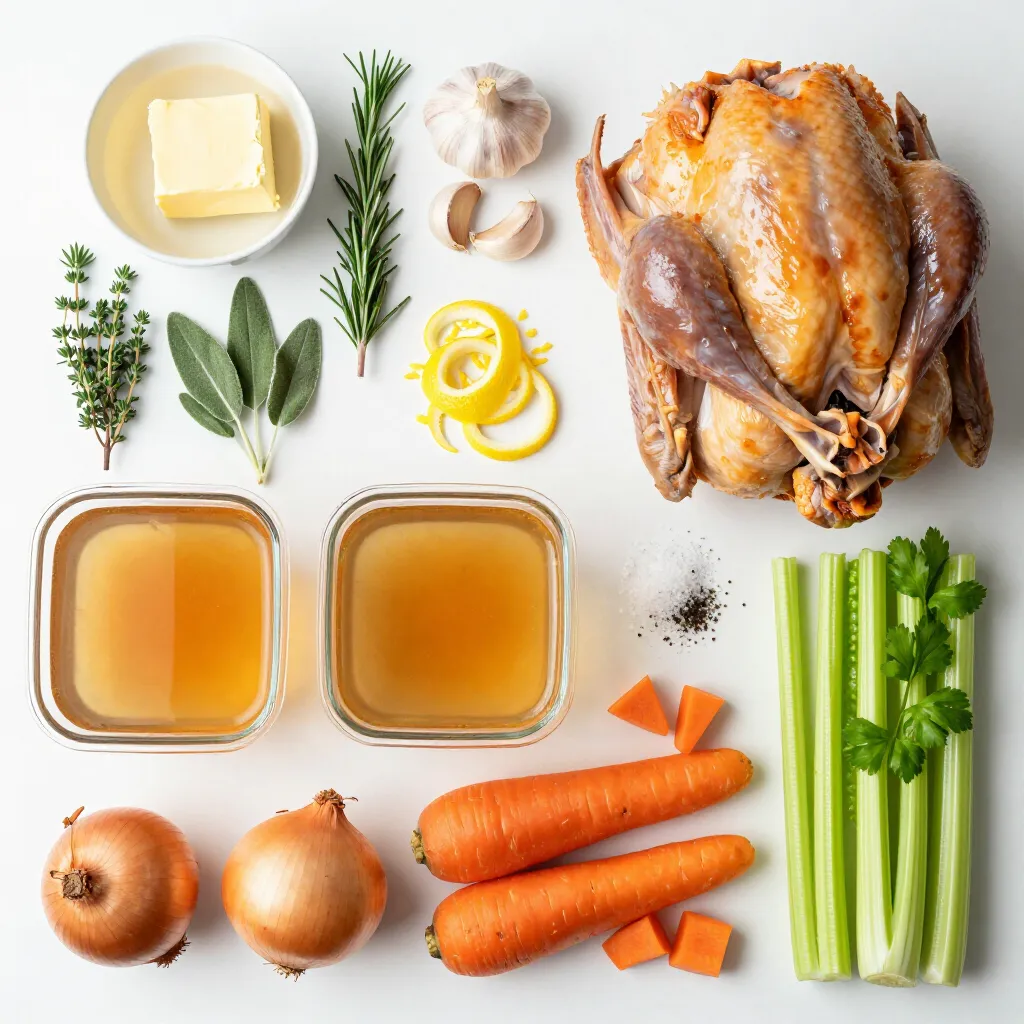
– 1 whole turkey (10-12 pounds)
– 1 cup unsalted butter, softened
– 6 cloves garlic, finely minced
– 2 tablespoons fresh rosemary, finely chopped
– 2 tablespoons fresh thyme, finely chopped
– 2 tablespoons fresh sage, finely chopped
– Zest of 1 lemon (preferably organic)
– 1 tablespoon kosher salt
– 1 teaspoon freshly ground black pepper
– 4 cups low-sodium chicken broth
– 2 onions, quartered
– 4 large carrots, cut into large chunks
– 4 celery stalks, cut into large chunks
Optional Garnishes
– Fresh herbs like rosemary, thyme, or parsley can add a nice touch. They make your dish look pretty and taste fresh. Try to use herbs that match the flavors in your turkey.
Ingredient Substitutions
– If you can’t find unsalted butter, you can use salted butter. Just cut back on the kosher salt.
– Any fresh herbs can work. If you don’t have rosemary, thyme, or sage, use what you have on hand.
– For the broth, you can use vegetable broth if you want a lighter option. Just remember to check the salt level.
– If you don’t have fresh herbs, you can use dried herbs. Just use less, as dried herbs are stronger in flavor.
Step-by-Step Instructions
Prepping the Oven and Turkey
Start by preheating your oven to 325°F (165°C). This step sets the stage for a well-cooked turkey. Next, remove your turkey from the fridge. Use paper towels to pat it dry inside and out. Drying the turkey helps the skin turn crispy.
Making the Garlic Herb Butter
In a medium bowl, combine these ingredients:
– 1 cup unsalted butter, softened
– 6 cloves garlic, finely minced
– 2 tablespoons fresh rosemary, chopped
– 2 tablespoons fresh thyme, chopped
– 2 tablespoons fresh sage, chopped
– Zest of 1 lemon
– 1 tablespoon kosher salt
– 1 teaspoon black pepper
Mix these well until you have a smooth and creamy herb butter. This butter is the secret to adding flavor to your turkey.
Seasoning and Arranging the Turkey
Now it’s time to season the turkey. Gently slide your fingers under the skin over the breast. Be careful not to tear it. Take about half of the garlic herb butter and spread it underneath the skin. Then, rub the rest of the herb butter all over the outside of the turkey. Make sure to coat the legs, wings, and breast well.
In a large roasting pan, lay quartered onions, large carrot chunks, and celery chunks at the bottom. These will add flavor and aroma. Place the turkey on top of the vegetables. Pour in low-sodium chicken broth around the turkey but avoid rinsing off the herb butter.
Now your turkey is ready for the oven!
Cooking Time and Temperature
Recommended Oven Temperature
Set your oven to 325°F (165°C). This is the ideal temperature for roasting a turkey. It helps cook the turkey evenly and keeps it moist.
Estimated Cooking Time Per Weight
For a turkey weighing between 10-12 pounds, roast it for about 2 to 2.5 hours. A good rule is 13-15 minutes per pound. Each turkey is unique, so keep an eye on it as it cooks.
Checking Internal Temperature
Use a meat thermometer to check your turkey’s doneness. Insert it into the thickest part of the thigh. It should read 165°F (74°C). This ensures the turkey is safe to eat and juicy throughout. Always check the temperature before serving to avoid surprises!
Pro Tips
- Tip for Crispy Skin: Make sure to pat the turkey dry with paper towels before applying the herb butter. Moisture on the skin can prevent it from crisping up properly during roasting.
- Tip for Flavor Depth: Consider adding fresh lemon slices or garlic cloves inside the turkey cavity along with additional herbs. This will infuse the meat with even more flavor as it cooks.
- Tip for Even Cooking: Use a meat thermometer to check the turkey’s internal temperature. Insert it into the thickest part of the thigh without touching the bone for the most accurate reading.
- Tip for Resting: Allow the turkey to rest for at least 20-30 minutes after removing it from the oven. This allows the juices to redistribute, resulting in a more succulent turkey when carved.
Tips & Tricks
How to Achieve Crispy Skin
To get that perfect crispy skin, start with a dry turkey. Pat the turkey dry with paper towels. This helps the skin to crisp up in the oven. Next, use the garlic herb butter. Spread it under the skin and all over the outside. This not only adds flavor but also helps the skin brown nicely.
Roasting at the right temperature is key. I recommend 325°F (165°C). Cover the turkey with foil at first to keep it moist. Remove the foil during the last 45 minutes. This allows the skin to turn golden brown and crunchy.
Importance of Resting the Turkey
After roasting, let the turkey rest. This step is vital. Resting allows the juices to move back into the meat. If you skip this, the juices run out when you carve it. I suggest letting it sit for 20-30 minutes. Cover it loosely with foil to keep it warm.
This time makes a big difference in taste and texture. You’ll enjoy a tender, juicy turkey that everyone will love.
Basting Techniques for Juiciness
Basting keeps the turkey juicy and flavorful. Start basting during the last 45 minutes of cooking. Use the pan juices to baste the turkey every 15-20 minutes. This adds moisture and flavor.
Use a spoon or a baster to drizzle the juices over the turkey. Be careful not to wash off the herb butter. This technique helps you achieve a turkey that is not just tasty but also visually appealing.
Variations
Herb Combinations
You can mix and match herbs for your garlic herb butter. Try adding fresh parsley for a light taste. Oregano can bring a Mediterranean flavor. Basil works well too. Each herb adds its own twist. You can even use dried herbs if fresh ones are not on hand. Just remember, use less dried herbs than fresh. This keeps the flavor bright and fresh.
Cooking Methods
You can roast your turkey in different ways. Grilling adds a smoky taste. For this, use indirect heat and baste often. Smoking gives a rich flavor. Use wood chips like hickory or applewood for a unique taste. Make sure to keep the temperature low. This method takes longer but adds depth. Each method gives you a different flavor profile to enjoy.
Serving Suggestions
Pair your turkey with classic sides. Mashed potatoes and gravy are always a hit. Roasted vegetables bring color and nutrition. Consider stuffing for a hearty touch. A fresh salad can lighten the meal. For a special treat, serve cranberry sauce alongside. These sides enhance the turkey’s flavor and make your meal complete.
FAQs
How long to cook a 10-12 pound turkey?
For a 10-12 pound turkey, cook it for about 2 to 2.5 hours. Make sure to check the turkey’s internal temperature. It should reach 165°F in the thickest part of the thigh. This ensures the meat is safe and juicy.
Can I prepare the herb butter in advance?
Yes, you can make the herb butter ahead of time. Mix the softened butter, garlic, herbs, lemon zest, salt, and pepper together. Store it in the fridge for up to 2 days. Just remember to bring it back to room temperature before using it on the turkey.
What should I do if my turkey is still pink after cooking?
If your turkey is pink after cooking, check the internal temperature. Use a meat thermometer to confirm it has reached 165°F. If it hasn’t, return it to the oven until it does. Sometimes, the pink color can come from the cooking process or the turkey’s age, but always trust the thermometer for safety.
You now have a clear path to cooking a perfect turkey. We covered the key ingredients and their roles. I shared step-by-step instructions for a tasty roast. Cooking time and temperature guidelines help you avoid undercooking. Tips, tricks, and variations ensure your turkey stands out. Remember, practice makes perfect. Enjoy your cooking journey, and don’t hesitate to try new flavors and methods! Your next turkey can be a delicious hi