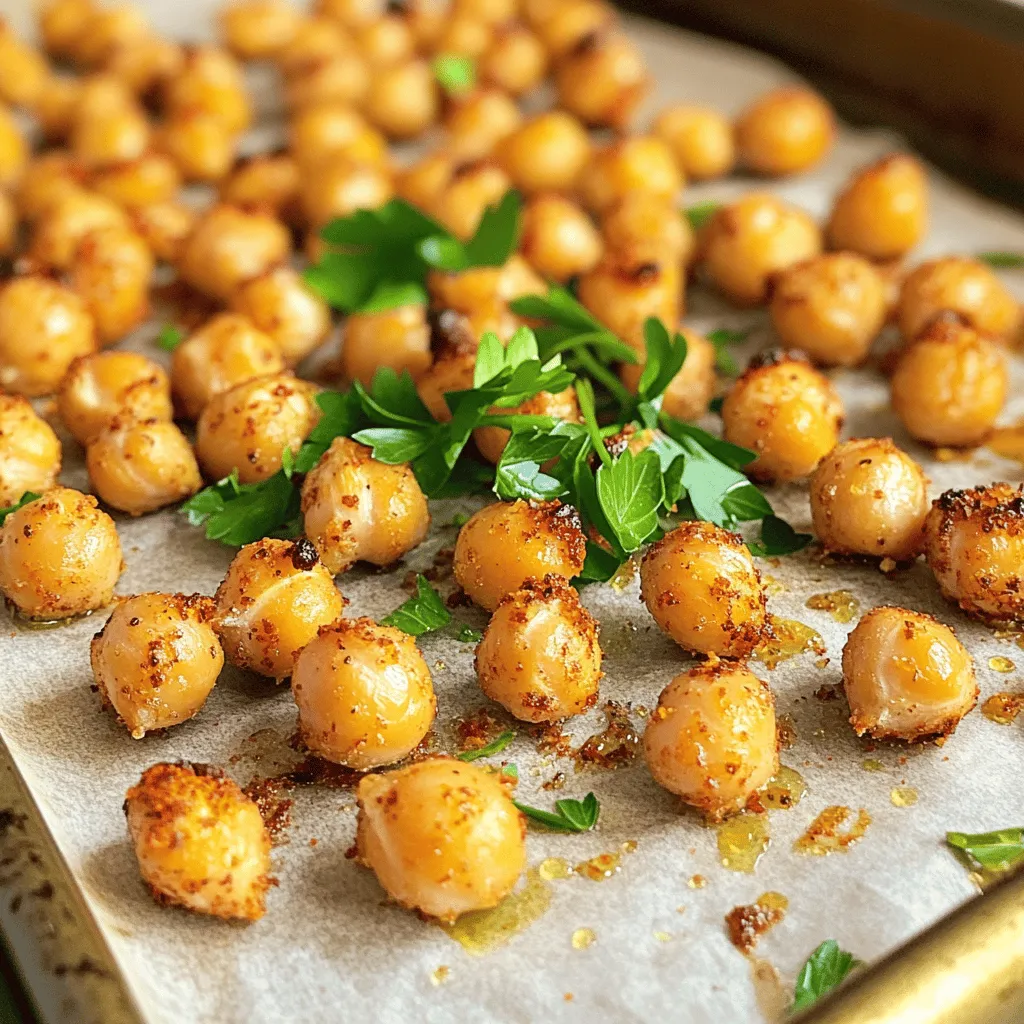
Are you ready to crunch your way to a healthier snack? Crispy Garlic Roasted Chickpeas are not just tasty, they’re easy to make and packed with flavor. In this recipe, you’ll discover the perfect mix of spices that turns simple chickpeas into a delicious treat. Let’s dive into the steps, tips, and flavor twists that will make your snack time exciting and fun! You won’t want to miss this.
Ingredients
Main Ingredients for Crispy Garlic Roasted Chickpeas
To make crispy garlic roasted chickpeas, you need:
– 1 can (15 oz) chickpeas, thoroughly drained and rinsed
– 2 tablespoons extra virgin olive oil
– 4 cloves of fresh garlic, finely minced
– 1 teaspoon smoked paprika for depth of flavor
– 1 teaspoon ground cumin for warmth
– 1/2 teaspoon cayenne pepper (adjust based on your spice preference)
– Sea salt and freshly ground black pepper to taste
– Fresh parsley, finely chopped (for vibrant garnish)
These main ingredients give the chickpeas a great taste and texture. The olive oil helps them crisp up nicely. Garlic adds a wonderful aroma, while spices like paprika and cumin bring warmth.
Optional Seasoning Additions
You can spice up your chickpeas even more with these optional add-ins:
– Lemon zest for a bright note
– A sprinkle of nutritional yeast for a cheesy flavor
– A dash of onion powder for added depth
– Fresh herbs like thyme or rosemary for a fragrant twist
Adding these seasonings can take the flavor to the next level. Experiment with what you like best!
Notes on Fresh vs. Dried Chickpeas
You can use canned chickpeas for ease, but dried chickpeas are also great. If you choose dried chickpeas, soak them overnight and cook them until tender. This gives you more control over texture. However, canned chickpeas save time and still taste amazing in this recipe.
For the best results with either type, ensure they are well-drained and dry before roasting. Moisture can prevent crispiness.
Step-by-Step Instructions
Preparing the Oven and Chickpeas
Start by preheating your oven to 400°F (200°C). Line a baking sheet with parchment paper. This helps the chickpeas cook evenly and keeps them from sticking. After that, take one can of chickpeas, drain and rinse them well. Pat them dry with a clean kitchen towel. Removing moisture is key for crispiness!
Mixing the Ingredients
In a large mixing bowl, add the dried chickpeas. Pour in 2 tablespoons of extra virgin olive oil. Then, add 4 cloves of finely minced garlic, 1 teaspoon of smoked paprika, and 1 teaspoon of ground cumin. For some heat, include 1/2 teaspoon of cayenne pepper, and season with sea salt and black pepper. Mix everything well so each chickpea gets coated.
Roasting Techniques for Perfect Crispiness
Spread the seasoned chickpeas onto your prepared baking sheet. Make sure they are in a single layer. If they are too crowded, they won’t get crispy. Place the baking sheet in the oven and roast for 20-25 minutes. Halfway through, stir the chickpeas. This ensures they brown evenly. Keep an eye on them to avoid burning.
Cooling Period for Increased Crunch
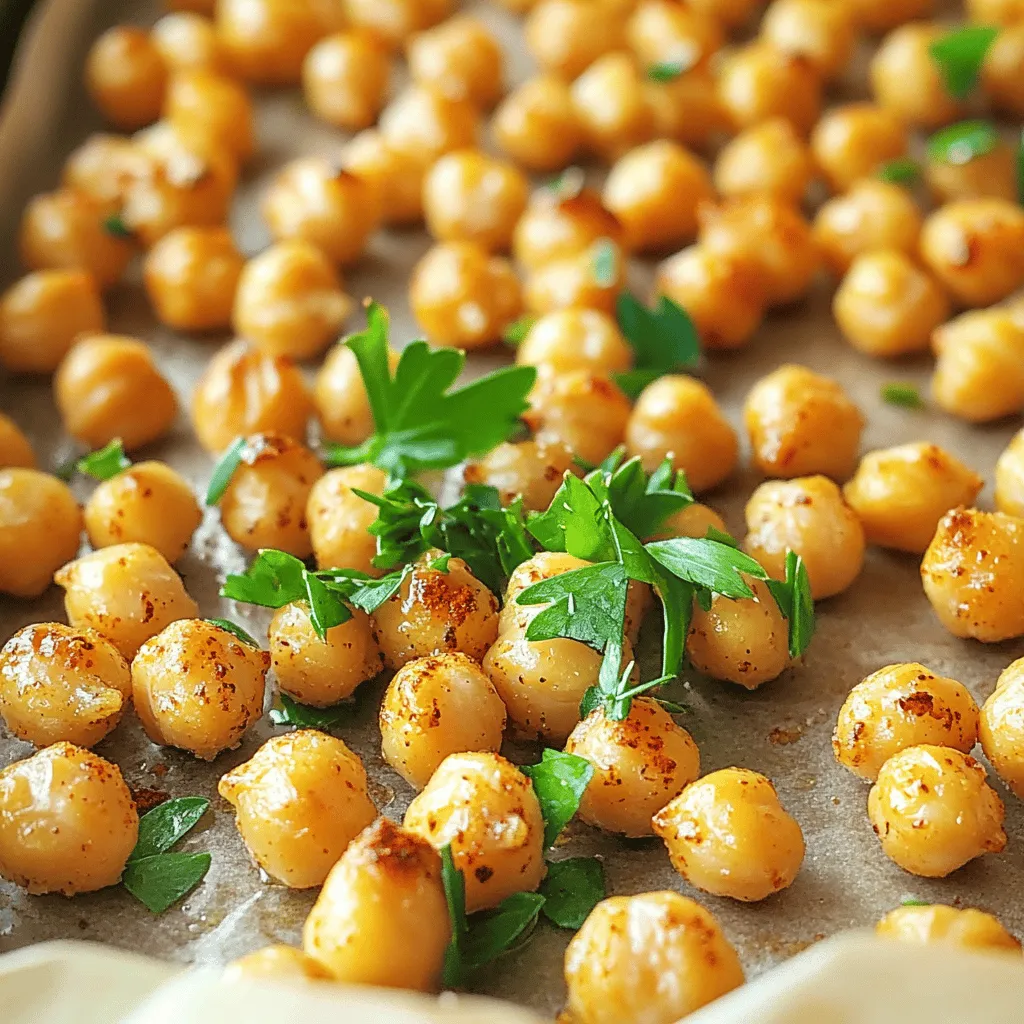
Once they are golden brown, take the chickpeas out of the oven. Let them cool for a few minutes. During this time, they will continue to crisp up. Before serving, sprinkle some finely chopped fresh parsley on top. This adds nice color and freshness to the dish. Enjoy these crispy garlic roasted chickpeas as a tasty snack!
Tips & Tricks
Achieving Maximum Crispiness
To get your chickpeas super crispy, follow these tips:
– Always dry the chickpeas well after rinsing.
– Use a single layer on your baking sheet.
– Don’t overcrowd the chickpeas; space helps them roast evenly.
– Stir them halfway through roasting for uniform crispiness.
– Let them cool on the baking sheet to firm up.
Common Mistakes to Avoid
Avoid these pitfalls for perfect roasted chickpeas:
– Skipping the drying step can lead to soggy snacks.
– Using too much oil makes them greasy.
– Not stirring can result in uneven roasting.
– Roasting at the wrong temperature can burn them.
Best Oils and Seasoning Pairings
For the best flavor and texture, consider these oils and seasonings:
– Extra virgin olive oil works great for richness.
– Avocado oil offers a high smoke point and mild flavor.
– Try garlic powder, onion powder, or chili powder for extra zing.
– Fresh herbs like rosemary or thyme can add a lovely touch.
Experiment with these tips, and you’ll enjoy the crunch of crispy garlic roasted chickpeas!
Variations
Spicy Variations with Additional Seasonings
You can spice up your crispy garlic roasted chickpeas easily. Add chili powder or crushed red pepper for heat. Try adding a dash of curry powder for a warm flavor too. For a smoky twist, use smoked paprika. These spices can change the whole taste. Feel free to mix and match until you find your favorite blend.
Flavor Combinations: Sweet & Savory Twists
If you love sweet flavors, try drizzling honey or maple syrup over the chickpeas before roasting. This gives a sweet and salty taste. You can also add a pinch of cinnamon or nutmeg for warmth. These flavors work great together. The contrast of sweet and savory creates a tasty snack that keeps you coming back for more.
Dietary Modifications for Vegan or Gluten-Free
Chickpeas are naturally vegan and gluten-free, making them a perfect snack. If you want to change the oil, use avocado oil instead of olive oil. This keeps the recipe vegan while adding a unique flavor. Always check seasoning labels to ensure they are gluten-free. You can enjoy crispy garlic roasted chickpeas while sticking to your diet!
Storage Info
How to Store Leftover Crispy Chickpeas
Store your leftover crispy chickpeas in an airtight container. This keeps them fresh and prevents them from getting soggy. Allow the chickpeas to cool completely before sealing the container. If they are warm, steam may form inside and ruin the crunch.
Recommended Containers and Duration
Use a glass or plastic container with a tight lid. This helps maintain their crispiness. You can store the chickpeas for up to 3 days at room temperature. If you want them to last longer, you can refrigerate them for up to a week. Just remember, the longer they sit, the less crispy they become.
Reheating Tips for Retaining Crispiness
To reheat, spread the chickpeas on a baking sheet. Preheat your oven to 375°F (190°C). Bake them for about 5-10 minutes. This warms them up and brings back some crunch. Avoid using a microwave, as it will make them soft. Following these steps will help you enjoy your crispy garlic roasted chickpeas even after a few days.
FAQs
Can I use dried chickpeas instead of canned?
Yes, you can use dried chickpeas. However, dried chickpeas need soaking. Soak them overnight in water. After soaking, cook them until tender. This process may take a few hours. Canned chickpeas are already cooked, making them quicker to use. If you want the best texture, use canned chickpeas for this recipe.
How do I know when the chickpeas are done?
The chickpeas are done when they turn golden brown. They should be crispy and not soft. Stir them halfway through roasting to check. Keep an eye on them in the last few minutes. If they start to smell good and look brown, they are ready!
What can I serve with crispy garlic roasted chickpeas?
Crispy garlic roasted chickpeas are great on their own. You can also serve them as a topping on salads. They add a nice crunch to soups too. Try mixing them into bowls with grains and veggies for more flavor. They are perfect for snacking anytime!
What is the nutritional value of crispy garlic roasted chickpeas?
Crispy garlic roasted chickpeas are high in protein and fiber. They provide healthy fats from olive oil. One serving has about 130 calories. They are a great snack choice for health. Plus, they are low in sugar and full of flavor. Enjoy them guilt-free!
Crispy garlic roasted chickpeas are simple and tasty. We covered the main ingredients and optional seasonings. You learned how to prepare them for perfect crispiness. Tips helped avoid mistakes and shared oil pairings.
Try different flavors like spicy or sweet. Store them right to keep them fresh. Enjoy these snacks anytime you want a healthy treat. Now it’s time to make your own crispy chickpeas and impress your friends!