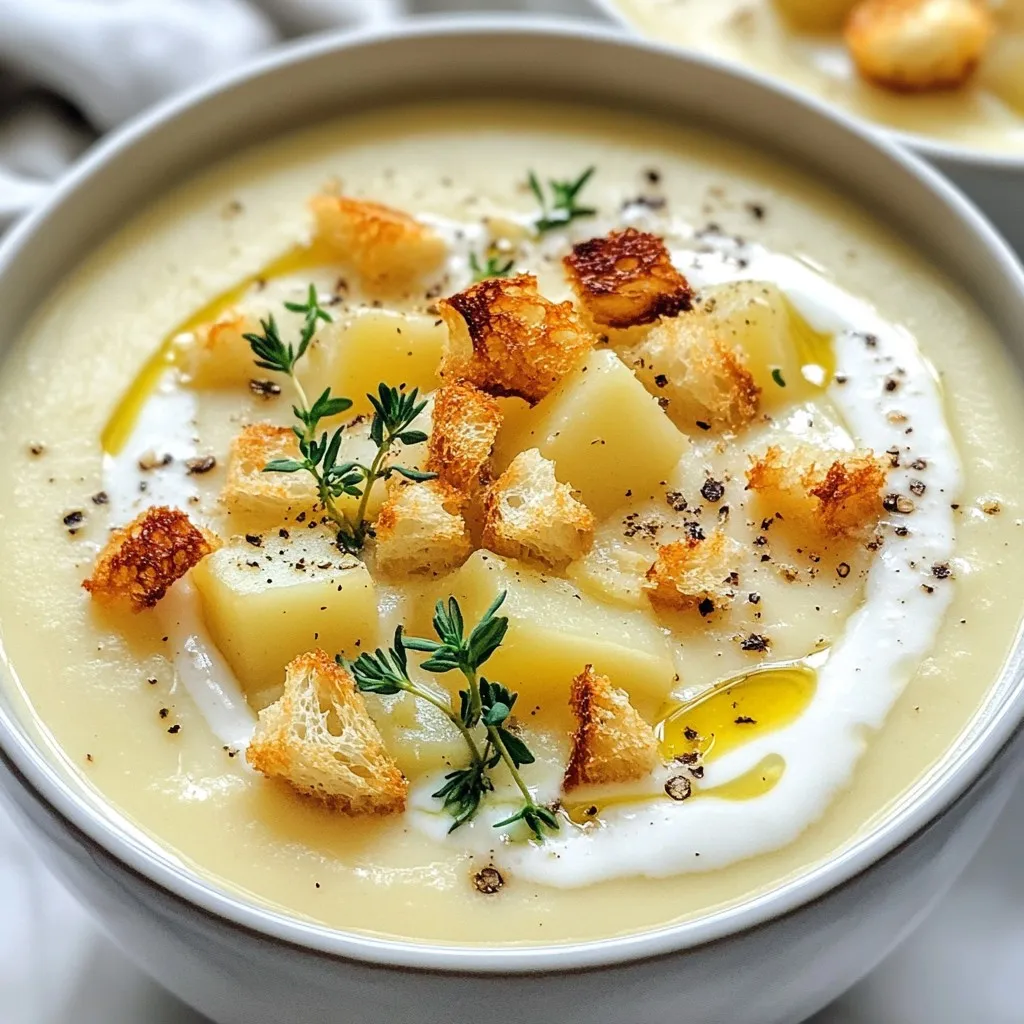
Welcome to a warm and comforting recipe you’ll want to make again and again: Creamy Roasted Garlic Soup. This rich and smooth delight combines the sweet richness of roasted garlic with fresh veggies for an unforgettable taste. Ready to impress your taste buds? Let’s dive into the simple ingredients, step-by-step instructions, and helpful tips that will guide you in creating the perfect bowl of soup!
Why I Love This Recipe
- Comforting Flavor: This velvety roasted garlic soup envelops you in warmth and comfort, making it the perfect dish for chilly days.
- Simple Ingredients: With just a handful of basic ingredients, this recipe proves that delicious meals don’t have to be complicated.
- Versatile Options: Whether you choose heavy cream for richness or coconut milk for a vegan twist, this soup can cater to various dietary preferences.
- Garnish Potential: The addition of fresh thyme and croutons adds not only flavor but also a delightful texture to the soup.
Ingredients
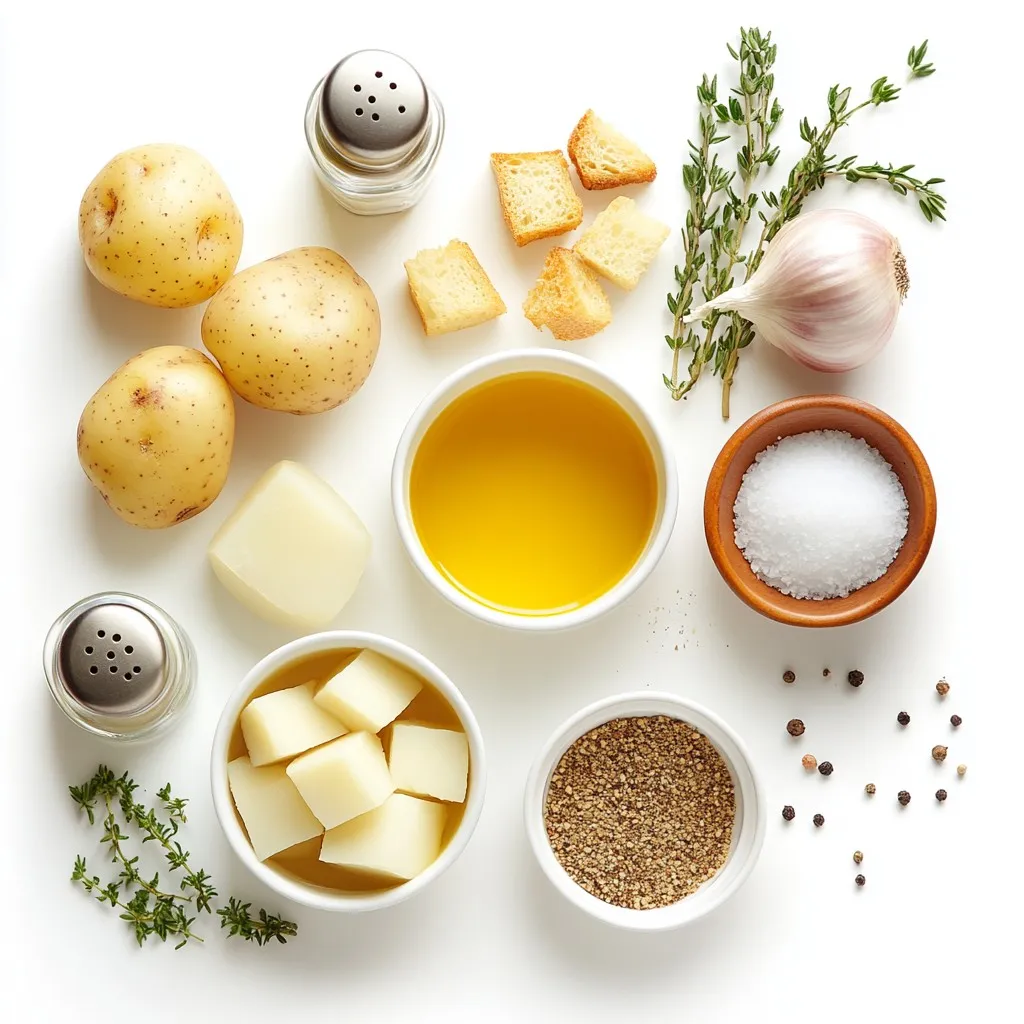
Complete List of Ingredients
To make creamy roasted garlic soup, you will need:
– 2 whole bulbs of garlic
– 1 medium onion, finely diced
– 2 tablespoons olive oil
– 4 cups vegetable broth
– 1 large potato, peeled and cut into cubes
– 1 cup heavy cream (or coconut milk for a vegan option)
– Salt and pepper to taste
– Fresh thyme leaves for garnish
– Optional: Croutons for a crunchy topping
Possible Substitutions
You can swap ingredients to fit your needs. Use shallots instead of onion for a milder taste. If you want a lighter soup, replace heavy cream with evaporated milk. For a vegan option, coconut milk works well. If you prefer a different flavor, try using chicken broth instead of vegetable broth.
Nutritional Information per Serving
Each serving of this soup has about:
– Calories: 320
– Protein: 4g
– Fat: 25g
– Carbohydrates: 24g
– Fiber: 2g
– Sugar: 1g
This soup is rich and filling, making it a perfect meal for any day.
Step-by-Step Instructions
Preheating and Roasting Garlic
Start by preheating your oven to 400°F (200°C). This is the perfect temperature for roasting garlic. Take two whole bulbs of garlic and cut off the tops. This step reveals the cloves inside. Drizzle one tablespoon of olive oil on the exposed cloves. Wrap each bulb in aluminum foil. Place them in the oven and roast for about 40 minutes. The cloves should turn soft and golden brown. The smell will fill your kitchen with warmth.
Sautéing Onions and Adding Vegetables
While the garlic roasts, heat one tablespoon of olive oil in a large pot over medium heat. Add one medium onion, finely diced. Sauté the onion for about 5 minutes. You want it to be translucent and fragrant. Then, add one large potato, peeled and cut into cubes. Stir for another 2 minutes to combine the flavors. The potato will add creaminess to the soup.
Pureeing the Soup and Final Touches
After roasting, take the garlic out of the oven. Carefully squeeze the soft cloves from their skins into the pot. Pour in 4 cups of vegetable broth. Bring everything to a gentle boil. Once boiling, reduce the heat and simmer for about 15 minutes. This will soften the potatoes. Use an immersion blender to puree the soup until it is silky smooth. If you don’t have one, carefully transfer the soup in batches to a regular blender. Return the pureed soup to the pot. Stir in 1 cup of heavy cream or coconut milk. Heat gently until warm, but do not let it boil. Finally, season with salt and pepper to taste. Serve in bowls, garnished with fresh thyme leaves. Add croutons for a crunchy topping if you like. Enjoy your creamy roasted garlic soup!
Tips & Tricks
How to Perfectly Roast Garlic
To roast garlic well, start with fresh bulbs. Cut off the tops to expose the cloves. Drizzle olive oil on them. Wrap each bulb in aluminum foil. Roast at 400°F (200°C) for 40 minutes. The cloves should be soft and golden brown. Roasting gives garlic a sweet, rich flavor. This makes your soup taste amazing.
Making the Soup Vegan-Friendly
To make this soup vegan, swap the heavy cream for coconut milk. Coconut milk adds a nice creaminess. It also gives a hint of sweetness. You can use any plant-based milk, but coconut milk works best. This keeps the soup rich while making it vegan.
Best Practices for Blending Soup
When blending soup, use an immersion blender for ease. It allows you to blend right in the pot. If you use a traditional blender, be careful. Blend the soup in small batches to avoid spills. Always let the soup cool a bit first. This keeps you safe from hot splashes. Aim for a silky smooth texture for the best experience.
Pro Tips
- Use Fresh Garlic: Fresh garlic will give your soup a more vibrant flavor compared to dried or pre-minced garlic.
- Adjust Creaminess: If you prefer a lighter soup, reduce the amount of heavy cream or use more vegetable broth.
- Storage Tips: This soup can be stored in the refrigerator for up to 3 days or frozen for up to a month. Just reheat gently before serving.
- Experiment with Herbs: Try adding different herbs like rosemary or parsley for a unique twist on the flavor profile.
Variations
Add-Ins for Extra Flavor
You can make creamy roasted garlic soup even better with fun add-ins. Try adding cooked bacon or pancetta for a savory twist. A sprinkle of cheese, like cheddar or Parmesan, adds a rich taste. If you want some heat, mix in a pinch of red pepper flakes or a dash of hot sauce. Fresh herbs like parsley or chives will brighten the soup and add color. These add-ins can make each bowl unique and delicious.
Gluten-Free Modifications
This creamy roasted garlic soup is easy to make gluten-free. The base is already gluten-free since it uses vegetable broth and potatoes. Just ensure that any add-ins, like croutons or cheese, are also gluten-free. You can buy gluten-free croutons or make your own by toasting gluten-free bread. This way, everyone can enjoy a warm bowl of soup without worry.
Seasonal Variations for Ingredients
You can change the soup with seasonal ingredients to keep it fresh. In spring, add fresh peas or asparagus for a pop of green. In summer, try mixing in ripe tomatoes for a lighter flavor. Fall is perfect for adding roasted pumpkin or butternut squash for a richer taste. In winter, add kale or spinach for extra nutrients. Seasonal swaps keep the soup exciting and highlight what’s fresh at the market.
Storage Info
Proper Storage Techniques
To keep your creamy roasted garlic soup fresh, store it in an airtight container. Let the soup cool to room temperature before sealing it. This helps to prevent condensation, which can make the soup watery. You can store it in the fridge for up to three days. If you want to keep it longer, consider freezing it.
Reheating Instructions
When you’re ready to enjoy the soup again, reheat it gently. Pour the soup into a pot over low heat. Stir often to prevent it from sticking to the bottom. If the soup looks thick, add a splash of vegetable broth or water to thin it out. Heat until it’s warm, but do not let it boil.
Freezing the Soup for Later Use
Freezing is a great option for longer storage. Ladle the cooled soup into freezer-safe containers, leaving space at the top for expansion. Seal tightly and label with the date. The soup can last up to three months in the freezer. To thaw, place it in the fridge overnight before reheating. This way, you’ll have a warm, comforting dish ready whenever you want.
FAQs
Can I use garlic powder instead of roasted garlic?
No, garlic powder won’t give the same flavor. Roasted garlic has a sweet, rich taste. It also adds a smooth texture that garlic powder lacks. Roasting garlic transforms its sharpness into sweetness. If you want the best taste, use roasted garlic.
How long does creamy roasted garlic soup last in the fridge?
This soup lasts about 3 to 5 days in the fridge. Make sure to store it in an airtight container. If you want to keep it longer, consider freezing it. Just remember to cool the soup completely before you freeze it.
What can I serve with this soup?
You can serve this soup with crusty bread or a fresh salad. Grilled cheese sandwiches also pair well with it. For a crunchy touch, add croutons on top of the soup. Fresh herbs like parsley can enhance the flavor too. Enjoy your meal!
This blog post covered ingredients, step-by-step instructions, tips, variations, and storage for creamy roasted garlic soup. You learned about each ingredient and smart substitutes that keep your soup tasty. We discussed key steps, like roasting garlic and blending soup, plus ways to make it vegan. With helpful storage info, you can enjoy this soup later. Remember, cooking is fun; don’t be afraid to try new flavors. Enjoy making this soup your wa