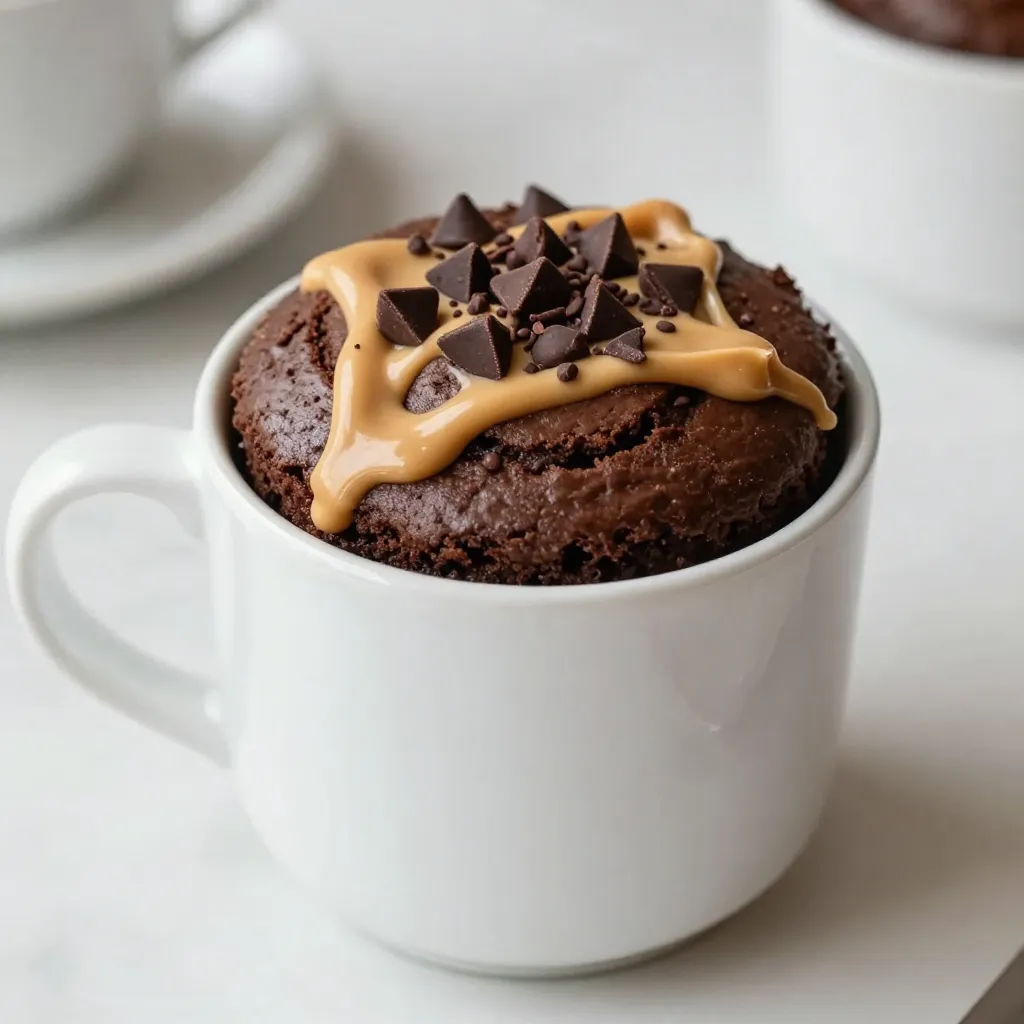
Craving a quick dessert? Let me introduce you to the ultimate chocolate peanut butter mug cake! This treat is quick to make, easy to customize, and bursting with delicious flavor. In just a few minutes, you can enjoy a warm, gooey mug of bliss. Perfect for when you want a satisfying chocolate fix without the fuss! Let’s dive into how to whip up this delightful dessert with just a few simple ingredients.
Why I Love This Recipe
- Quick and Easy: This mug cake can be prepared in just 5 minutes, making it the perfect dessert for a quick craving.
- Decadent Flavor: The combination of rich chocolate and creamy peanut butter creates an irresistible dessert that satisfies your sweet tooth.
- Customizable: You can easily adjust the ingredients to suit your preferences by adding different mix-ins like nuts or using alternative sweeteners.
- Single Serving: This recipe makes just one serving, so you can indulge without worrying about leftovers!
Ingredients
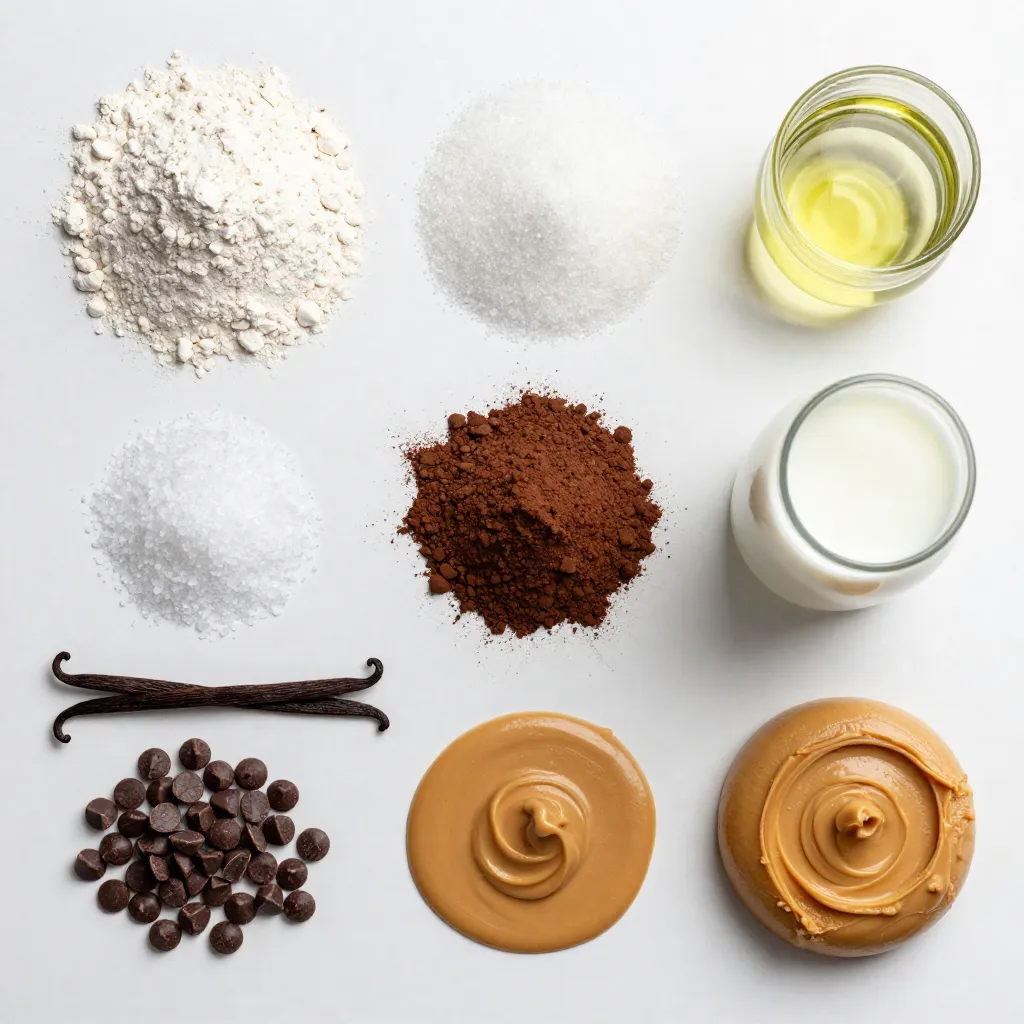
For the Chocolate Peanut Butter Mug Cake, you need a few simple items. Here is what you will require:
– 4 tablespoons all-purpose flour
– 4 tablespoons granulated sugar
– 2 tablespoons unsweetened cocoa powder
– 1/8 teaspoon baking powder
– 1/8 teaspoon salt
– 3 tablespoons milk (or your choice of non-dairy milk)
– 2 tablespoons creamy or crunchy peanut butter
– 1 tablespoon vegetable oil
– 1/4 teaspoon vanilla extract
– 1 tablespoon chocolate chips (optional for extra indulgence)
Gather these ingredients before you start. Each one plays a key role in making your mug cake rise and taste great. For example, all-purpose flour gives the cake its structure. The sugar adds sweetness, while cocoa powder provides that rich chocolate flavor. Don’t forget the peanut butter! It makes this cake creamy and delicious. You can also add chocolate chips if you want a little extra chocolate goodness. With these ingredients ready, you’re all set to make your treat!
Step-by-Step Instructions
Preparing the Dry Ingredients
Start with your microwave-safe mug. It should hold at least 12 ounces. Add these dry ingredients:
– 4 tablespoons all-purpose flour
– 4 tablespoons granulated sugar
– 2 tablespoons unsweetened cocoa powder
– 1/8 teaspoon baking powder
– 1/8 teaspoon salt
Mix these dry ingredients well. I like to use a small whisk or fork. This helps eliminate lumps. A smooth mix is key for a fluffy cake.
Combining Wet Ingredients
Now it’s time for the wet ingredients. Pour in:
– 3 tablespoons milk (or your choice of non-dairy milk)
– 2 tablespoons creamy or crunchy peanut butter
– 1 tablespoon vegetable oil
– 1/4 teaspoon vanilla extract
Stir this mixture vigorously. Use a spoon or spatula to blend it all together. You want a smooth batter. If you want extra chocolate, fold in 1 tablespoon of chocolate chips now.
Microwaving the Mug Cake
Place your mug in the microwave. Cook it on high for 30 to 40 seconds. Microwave wattages vary, so watch it closely. The cake should rise and look set in the center.
Be careful not to overcook it. The cake will firm up more once it’s out. After cooking, let it cool for about a minute. This prevents burning your tongue. Enjoy your warm, gooey treat!
Tips & Tricks
Perfecting Your Mug Cake
To make your mug cake perfect, start by avoiding overcooking. The microwave can cook fast. Cook your cake for 30 to 40 seconds. Check it after 30 seconds. If it’s risen and set, it’s ready. If you see it still wet, give it 5 more seconds.
Achieving the right texture is key. The cake should be soft and fluffy. If it feels rubbery, you likely cooked it too long. Remember, it will firm up as it cools. So, take it out when it looks just right.
Enhancements and Serving Suggestions
Adding toppings can take your mug cake to the next level. Drizzle peanut butter or melted chocolate on top. This gives extra flavor and makes it look fancy.
Pair your cake with whipped cream or ice cream. This adds creaminess and cools down the warm cake. You can even add a sprinkle of chocolate chips on top for extra sweetness. Enjoy your treat!
Pro Tips
- Use a Larger Mug: Ensure your mug is at least 12 oz to prevent overflow while the cake rises in the microwave.
- Mix Thoroughly: Combine dry ingredients first to avoid clumps, and then mix wet ingredients in well for a smoother batter.
- Watch the Cooking Time: Microwave wattages can vary significantly; keep an eye on your mug cake to avoid overcooking.
- Customize Your Toppings: Feel free to add fresh fruits, whipped cream, or a drizzle of caramel for a personalized touch!
Variations
Alternative Flavored Mug Cakes
You can easily change the flavor of your mug cake. Try different nut butters, like almond or cashew. These will add new tastes and textures. You can also add spices, like cinnamon or nutmeg. A pinch of these spices can give your cake a warm twist. You may even consider mixing in a bit of cocoa nibs for extra crunch.
Nut-Free Options
If you need a nut-free treat, don’t worry! You can swap peanut butter with sun butter or soy nut butter. These spreads still provide that creamy texture. For a vegan version, use non-dairy milk and a plant-based butter. You can also try using applesauce instead of oil. This will keep your cake moist and delicious without any dairy or nuts.
Storage Info
Storing Leftover Mug Cake
To keep your mug cake fresh, store it in the fridge. Place it in an airtight container. This helps keep it moist. You can refrigerate it for up to two days. When you’re ready to enjoy it, you can reheat it. Heat it in the microwave for about 10 to 15 seconds. Check to see if it’s warm enough. If not, add a few more seconds until it’s just right.
Making Ahead
You can prep the dry ingredients in advance. Mix the flour, sugar, cocoa powder, baking powder, and salt in a bowl. Store this mix in an airtight container. When you want to make the mug cake, just add the wet ingredients. This saves you time. For quick assembly, keep peanut butter, milk, and oil close by. This way, your treat is ready in minutes.
FAQs
Can I use a different type of flour?
Yes, you can use other flours. Almond flour or oat flour work well. Each type gives a unique taste. Almond flour makes it nutty and rich. Oat flour adds a light texture. Try these options to switch things up.
Is it possible to make this mug cake gluten-free?
Absolutely! To make it gluten-free, use gluten-free flour. Look for blends specifically made for baking. They often work best and keep the cake light. You can also try almond flour or coconut flour. Each option adds a different flavor and texture.
How do I prevent my mug cake from overflowing?
Choose a large mug, at least 12 oz. This gives the cake room to rise. Watch the cooking time closely. Start with 30 seconds. If it’s not done, add more time in small bursts. This helps prevent overflow and keeps your cake perfect.
Making a mug cake is simple and fun. We gathered all the must-have ingredients like flour, peanut butter, and cocoa powder. You learned the steps for mixing dry and wet ingredients to create a smooth batter. I shared tips for perfecting your cake and fun variations to try.
In the end, this quick treat can be unique for everyone. Experiment with flavors, mix-ins, or toppings. Enjoy your mug cake, and let your taste buds guide yo