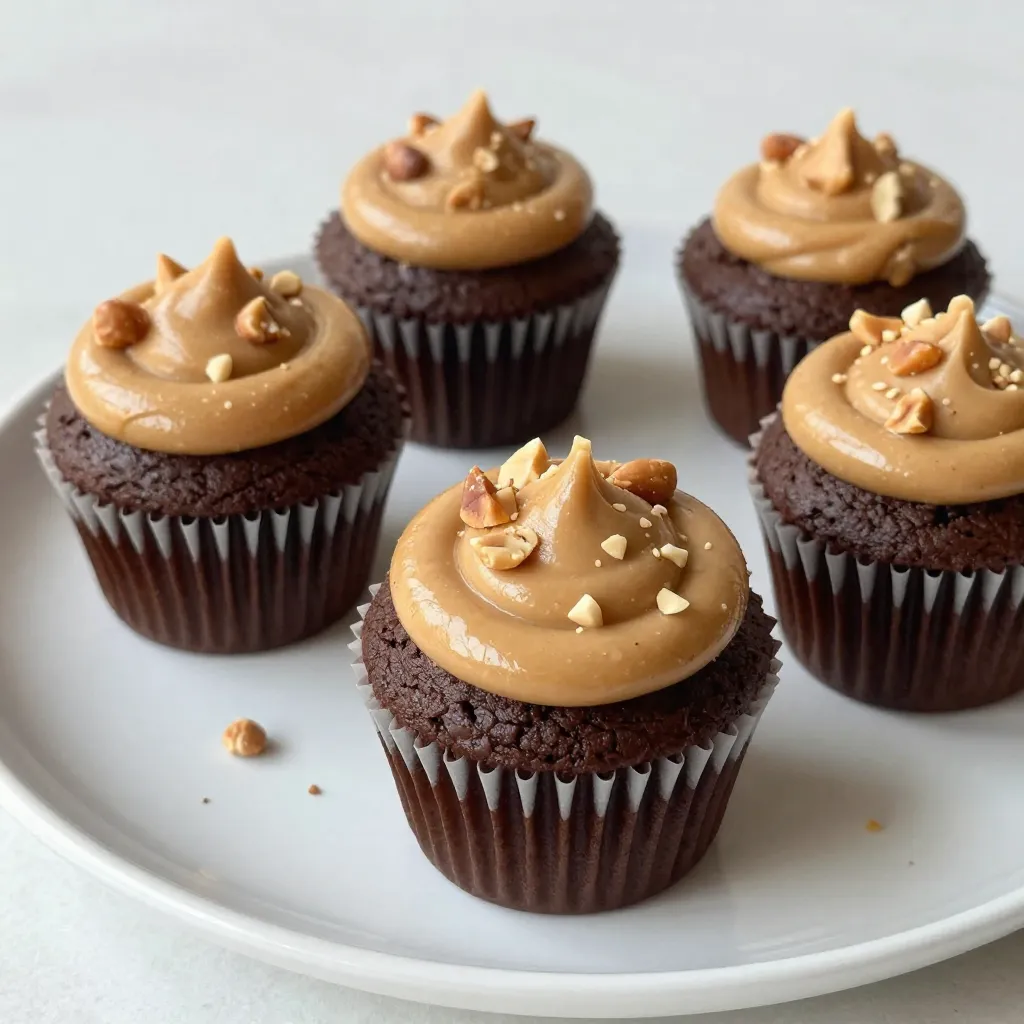
Are you craving something sweet and savory? Let me introduce you to Chocolate Peanut Butter Cupcakes, a treat so good, you can’t resist! With fluffy cupcakes packed with rich cocoa and creamy peanut butter, they are perfect for any occasion. In this post, I’ll guide you step-by-step from gathering ingredients to baking. Get ready to enjoy the deliciousness your taste buds deserve!
Why I Love This Recipe
- Decadent Flavor: These cupcakes are the perfect combination of rich chocolate and creamy peanut butter, making them a delightful treat for any chocolate lover.
- Easy to Make: This recipe is straightforward and requires minimal effort, making it perfect for both novice and experienced bakers.
- Customizable Toppings: You can get creative with the toppings, adding different nuts, chocolate drizzles, or even mini peanut butter cups for extra flair.
- Perfect for Any Occasion: These cupcakes are great for parties, celebrations, or just a sweet treat at home, satisfying everyone’s sweet tooth.
Ingredients
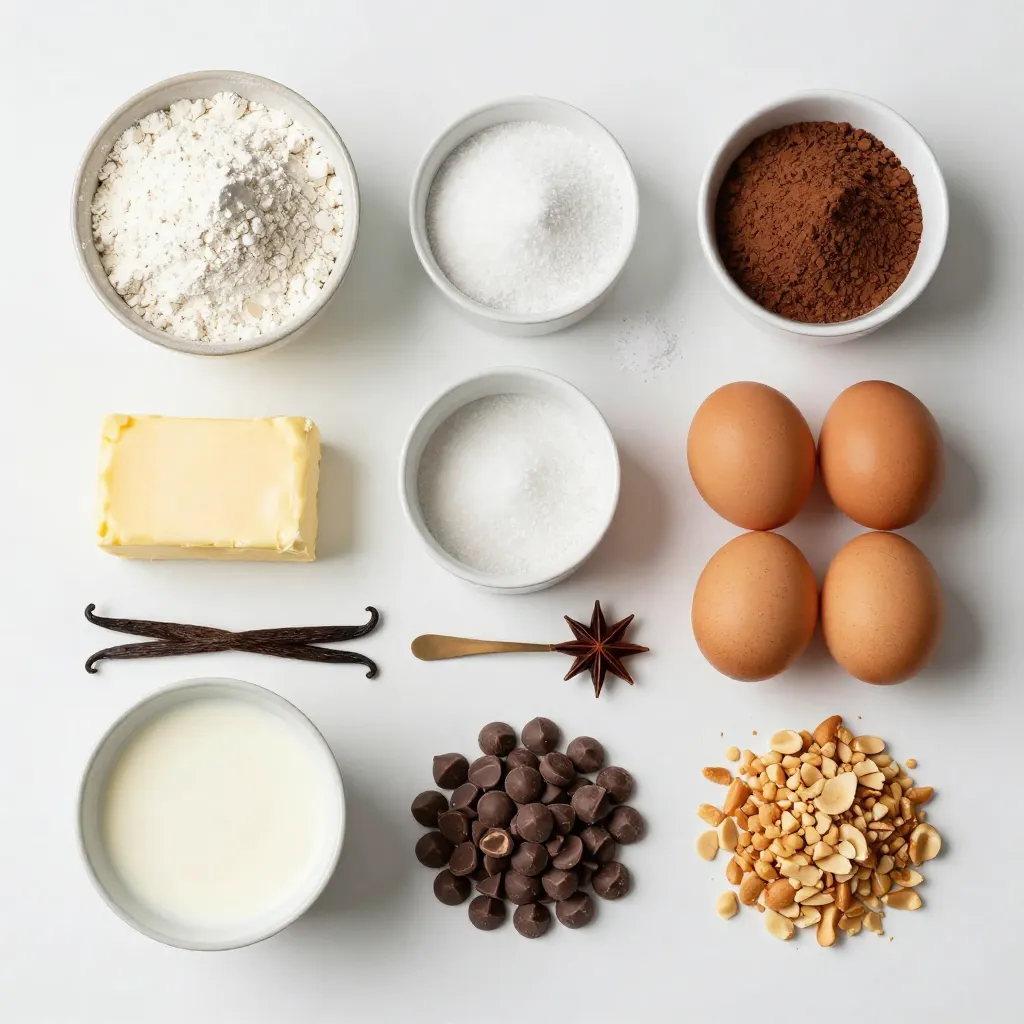
Complete Ingredients List
– 1 cup all-purpose flour
– 1 cup granulated sugar
– 1/2 cup unsweetened cocoa powder
– 1 tsp baking powder
– 1/2 tsp baking soda
– 1/4 tsp salt
– 1/2 cup unsalted butter, softened
– 2 large eggs
– 1 tsp pure vanilla extract
– 1/2 cup buttermilk
– 1/2 cup creamy peanut butter
– 1/4 cup semi-sweet chocolate chips
– Optional toppings: roasted peanuts, extra peanut butter
To make these cupcakes, gather all your ingredients. The flour and sugar give the base. Cocoa powder adds rich chocolate flavor. Baking powder and baking soda help them rise. The salt enhances sweetness. Softened butter makes for a creamy batter. Eggs and buttermilk keep the cupcakes moist. Creamy peanut butter adds a nutty taste, while chocolate chips bring extra sweetness. For toppings, roasted peanuts add crunch, and more peanut butter gives a nice finish.
Using quality ingredients makes a big difference. Fresh eggs and good cocoa powder elevate the taste. Enjoy the process of gathering and measuring. It is part of the fun!
Step-by-Step Instructions
Prepping the Oven and Muffin Tin
Start by preheating your oven to 350°F (175°C). This step is key for even baking. Line a standard muffin tin with cupcake liners. Make sure you press them down so they stick well.
Mixing the Dry Ingredients
In a large mixing bowl, sift together the following:
– 1 cup all-purpose flour
– 1 cup granulated sugar
– 1/2 cup unsweetened cocoa powder
– 1 tsp baking powder
– 1/2 tsp baking soda
– 1/4 tsp salt
Sifting helps mix the ingredients and makes the cupcakes light.
Creaming Butter and Sugar
In a separate bowl, use an electric mixer. Beat 1/2 cup softened butter on medium speed. Mix until it looks creamy. Slowly add the dry sugar mixture while continuing to beat. This should take about 3-4 minutes. Your mix should look light and fluffy.
Incorporating Wet Ingredients
Now, it’s time to add the eggs. Add 2 large eggs one at a time. Mix well after each egg. Then, pour in 1 tsp of pure vanilla extract. Mix again until it’s nicely combined.
Combining Wet and Dry Mixtures
Next, combine the wet and dry mixtures. Slowly add the dry mix to the butter mix. Alternate with 1/2 cup buttermilk. Start and end with the dry mix. Stir gently until everything is mixed. Be careful not to over-mix.
Filling and Baking the Cupcakes
Use a spoon or an ice cream scoop to fill each cupcake liner. Fill them about two-thirds full with batter. Place the muffin tin in the preheated oven. Bake for 18–20 minutes. To check if they are done, insert a toothpick. It should come out clean or with a few moist crumbs.
Cooling and Decorating
Once baked, allow the cupcakes to cool in the tin for 5 minutes. Then, transfer them to a wire rack to cool completely. After they cool, add a swirl of extra creamy peanut butter on top. Finish with chopped roasted peanuts for a nice crunch.
Tips & Tricks
Baking Tips for Perfect Cupcakes
– Ensuring the right oven temperature: Always preheat your oven to 350°F (175°C). This step helps your cupcakes rise evenly. Use an oven thermometer if you are unsure of your oven’s actual temperature.
– Avoiding over-mixing the batter: Mix just until combined. Over-mixing can lead to dense cupcakes. Gently fold in ingredients like peanut butter and chocolate chips for the best texture.
Alternative Ingredient Suggestions
– Substitutions for vegan or gluten-free options: For a vegan version, replace eggs with flax eggs or applesauce. Use coconut oil instead of butter. For gluten-free cupcakes, swap out all-purpose flour for a gluten-free blend. Make sure the blend has xanthan gum for structure.
Frosting and Serving Ideas
– Options for frosting and presentation tips: Top your cupcakes with a simple peanut butter frosting or chocolate ganache. To serve, arrange them on a decorative platter. Drizzle melted chocolate over the tops for extra flair. Add mini peanut butter cups for a fun garnish.
Pro Tips
- Use Room Temperature Ingredients: Ensure your eggs and buttermilk are at room temperature for better incorporation into the batter, leading to a smoother and fluffier cupcake.
- Don’t Overmix: Once you combine the wet and dry ingredients, mix just until incorporated. Overmixing can lead to dense cupcakes instead of light and airy ones.
- Check for Doneness: Start checking your cupcakes a minute or two before the recommended bake time. Ovens can vary, and you want to avoid overbaking.
- Cool Completely Before Topping: Allow the cupcakes to cool completely before adding peanut butter and toppings. This prevents melting and ensures a beautifully presented finish.
Variations
Vegan Chocolate Peanut Butter Cupcakes
To make these cupcakes vegan, we need to swap some ingredients. Use plant-based butter instead of regular butter. Replace the eggs with flax eggs—mix one tablespoon of ground flaxseed with three tablespoons of water. Let it sit for a few minutes to thicken. Use almond milk or oat milk instead of buttermilk. Finally, ensure your chocolate chips are dairy-free. These changes keep the cupcakes rich and tasty while being vegan-friendly.
Gluten-Free Version
For a gluten-free version, you can use gluten-free flour blends. Look for blends that include rice flour, almond flour, or coconut flour. These options provide a good texture. Keep in mind that using almond flour will add a nutty flavor. You may need to adjust the liquid in the recipe. Start with the same amount of buttermilk but add a little extra if the batter seems too thick.
Different Flavor Twists
You can play around with flavors to make these cupcakes even more exciting! Try adding one tablespoon of instant coffee granules to enhance the chocolate taste. Spices like cinnamon or nutmeg can add warmth. For a fruity twist, mix in some orange or raspberry zest. You can even add a bit of sea salt on top for a sweet-salty flavor. Each of these ideas creates a unique cupcake experience!
Storage Info
How to Store Leftover Cupcakes
To keep your cupcakes fresh, let them cool completely. After cooling, cover them with plastic wrap. You can also place them in a container. This helps avoid drying out. Store them at room temperature for up to three days. If you want to keep them longer, consider freezing.
Freezing Cupcakes for Later Use
Freezing is a great option for leftover cupcakes. Start by letting them cool fully. Then, wrap each cupcake in plastic wrap. This keeps them safe from freezer burn. Place the wrapped cupcakes in an airtight bag or container. They can stay in the freezer for up to three months. To enjoy, take them out and let them thaw at room temperature.
Best Containers for Storage
For storing cupcakes, I recommend airtight containers. These containers keep the cupcakes moist and fresh. Look for containers that are made from food-safe materials. Glass or hard plastic works well. Avoid containers that are too large, as extra space can lead to drying out.
FAQs
Can I make these cupcakes ahead of time?
Yes, you can make these cupcakes ahead of time. Here are some tips for doing so:
– Bake the cupcakes and let them cool completely.
– Store them in an airtight container for up to three days.
– You can freeze them for up to three months. Just wrap each cupcake in plastic wrap.
– When ready to serve, thaw them overnight in the fridge.
What can I substitute for buttermilk?
If you don’t have buttermilk, here are some easy substitutes:
– Mix one cup of milk with one tablespoon of vinegar or lemon juice.
– Let it sit for about five minutes.
– You can also use plain yogurt or sour cream, thinning them with a little water.
How do I know when the cupcakes are done?
To check if the cupcakes are done, use a toothpick. Here’s what to do:
– Insert a toothpick into the center of a cupcake.
– If it comes out clean or with a few moist crumbs, they are done.
– If it has wet batter, bake for a few more minutes and test again.
Can I use chunky peanut butter instead?
You can use chunky peanut butter if you prefer. Here’s what to keep in mind:
– Chunky peanut butter adds texture to the cupcakes.
– The flavor will be a bit stronger and nuttier.
– Just remember, it may change how smooth the frosting looks.
You learned how to make tasty chocolate peanut butter cupcakes. We covered ingredients, steps, and tips for success. I also shared storage ideas and answers to common questions. Remember, baking is fun and creative. Don’t be afraid to try new flavors or variations. You can make these cupcakes your own! Enjoy your baking and impress your friends and family with these treat