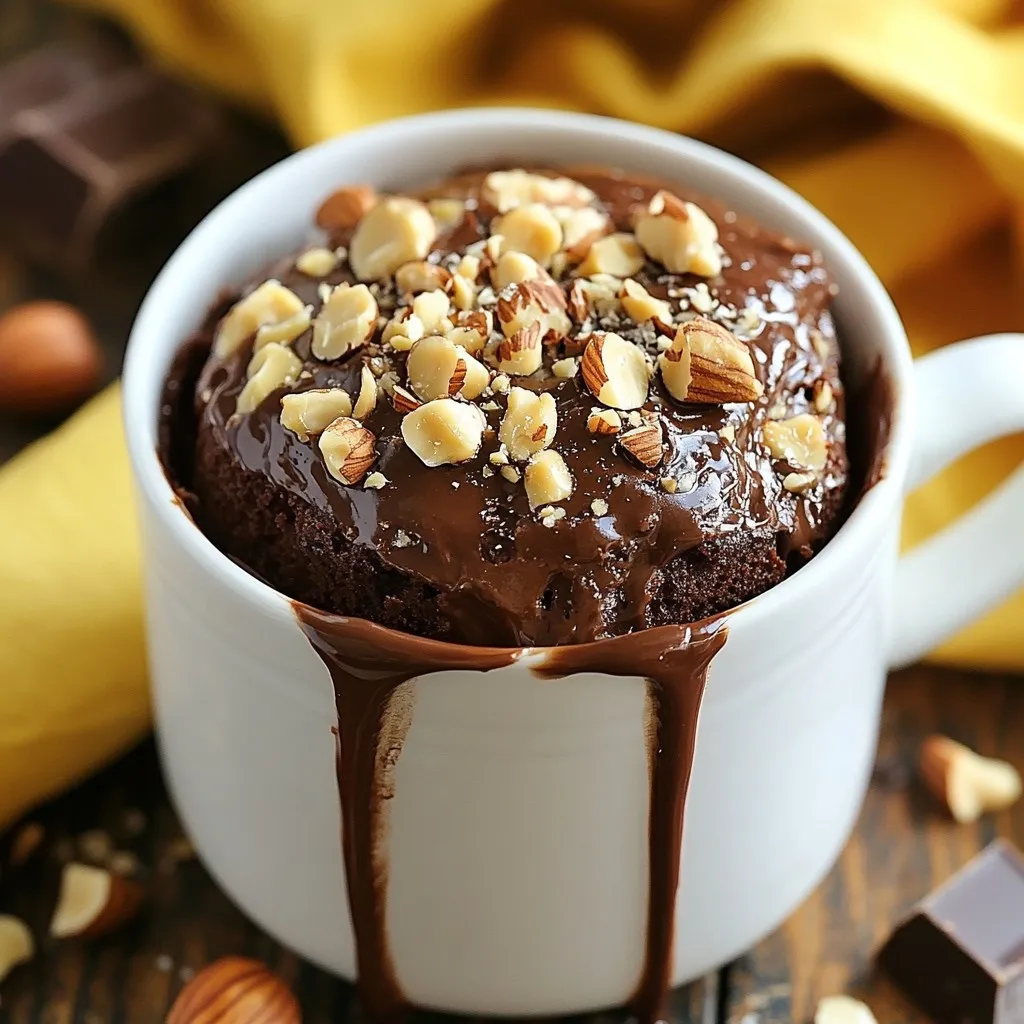
Craving a quick dessert that’s both easy and delicious? Look no further! This Chocolate Hazelnut Mug Cake recipe checks all the boxes for a sweet treat you can whip up in minutes. With simple ingredients and easy steps, you can enjoy a warm, gooey cake anytime. Ready to dive into making your new favorite mug cake? Let’s get started!
Why I Love This Recipe
- Quick and Easy: This mug cake takes only 5 minutes from start to finish, making it a perfect dessert for those late-night cravings.
- Decadent Flavor: The combination of rich chocolate and creamy hazelnut spread creates an indulgent flavor that satisfies your sweet tooth.
- Single Serving: Perfectly portioned for one, this recipe allows you to enjoy a delicious treat without the temptation of leftovers.
- Customizable: You can easily modify this recipe by adding different toppings or mix-ins, such as fruits or nuts, to suit your taste.
Ingredients
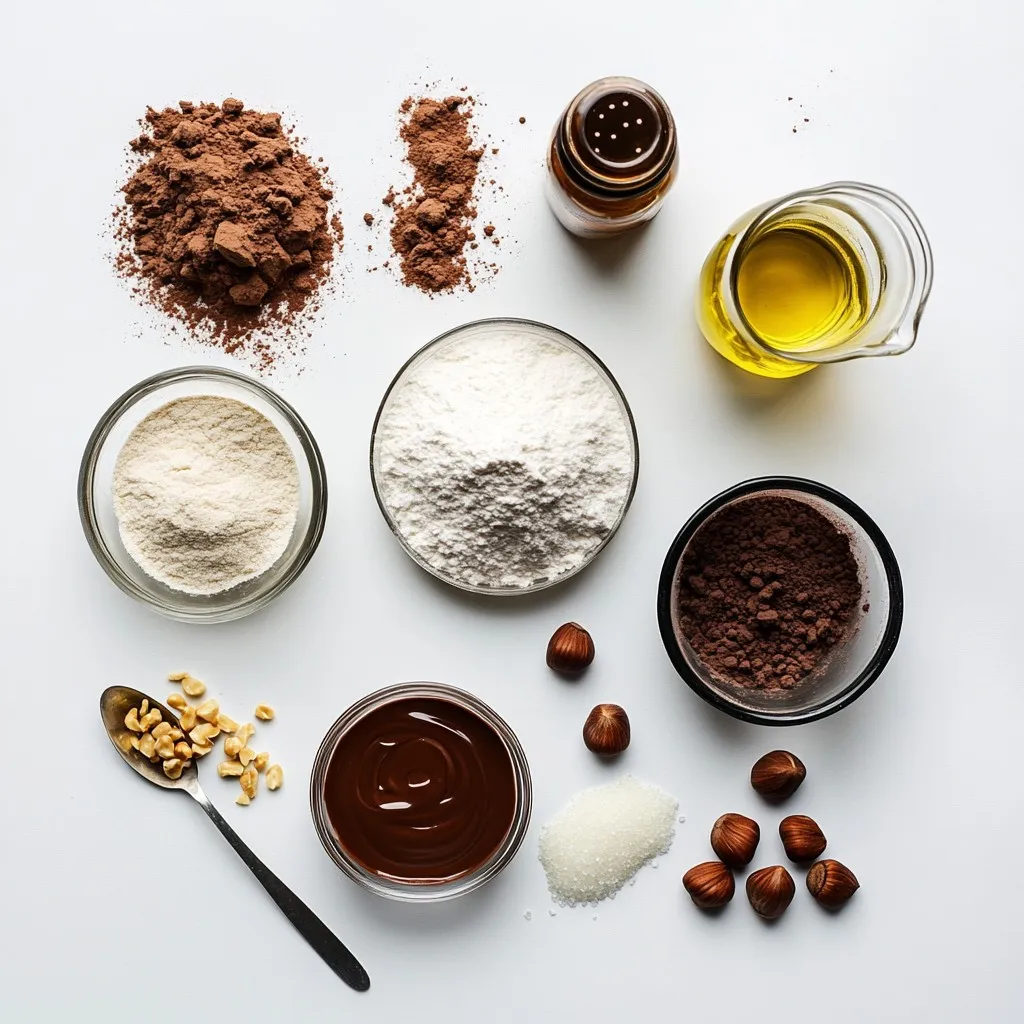
Here’s what you need for a tasty chocolate hazelnut mug cake:
– 4 tablespoons all-purpose flour
– 3 tablespoons granulated sugar
– 2 tablespoons unsweetened cocoa powder
– 1/8 teaspoon baking powder
– 1/8 teaspoon fine salt
– 3 tablespoons milk (or your preferred non-dairy alternative)
– 2 tablespoons vegetable oil
– 1/2 teaspoon pure vanilla extract
– 1 tablespoon chocolate hazelnut spread (like Nutella)
– Optional: Chopped hazelnuts for garnish
Each ingredient plays a key role in making this cake rich and gooey. The flour gives it structure, while sugar adds sweetness. Cocoa powder brings that deep chocolate flavor we all love. Baking powder helps it rise, and salt balances the sweetness. Milk and oil keep it moist, while vanilla adds a warm note.
The chocolate hazelnut spread is the star here. It melts and creates a gooey center. Adding chopped hazelnuts on top gives you a nice crunch. You’ll love how easy it is to gather these ingredients. Most are likely in your kitchen right now!
Step-by-Step Instructions
Preparing the Mug
Choosing the Right Mug
Select a microwave-safe mug that holds at least 12 ounces. A larger mug prevents spills.
Whisking Dry Ingredients
In the mug, mix these dry ingredients:
– 4 tablespoons all-purpose flour
– 3 tablespoons granulated sugar
– 2 tablespoons unsweetened cocoa powder
– 1/8 teaspoon baking powder
– 1/8 teaspoon fine salt
Whisk them well. You want no lumps to ensure a smooth batter.
Making the Batter
Adding Wet Ingredients
Now, pour in the wet ingredients:
– 3 tablespoons milk (or non-dairy)
– 2 tablespoons vegetable oil
– 1/2 teaspoon pure vanilla extract
Mixing Until Smooth
Stir the mixture until it is smooth. Look for a fluffy texture with no lumps left.
Incorporating Chocolate Hazelnut Spread
Swirling the Spread
Take 1 tablespoon of chocolate hazelnut spread. Spoon it on top of the batter.
Avoiding Full Incorporation
Use a toothpick or small spoon to swirl the spread gently. Don’t mix it fully; leave some swirls for a gooey center.
Cooking the Mug Cake
Microwave Cooking Tips
Place the mug in the microwave. Cook it on high for about 40-60 seconds. Watch closely, as cooking times can vary.
Checking for Doneness
The cake should rise and be set but still slightly moist in the middle.
Serving Suggestions
Cooling Time
Let the mug cake cool for about a minute. This step helps it firm up a bit.
Optional Garnishes
If you want, sprinkle some chopped hazelnuts on top. This adds a nice crunch and more flavor. Enjoy your cake right from the mug!
Tips & Tricks
Achieving the Perfect Texture
– Avoiding Overcooking: Microwave power varies, so stay close while it cooks. Start with 40 seconds. If it’s not set, add 10-second bursts until done. Overcooking makes the cake dry.
– Ensuring a Gooey Center: To get that delicious melted center, don’t mix the hazelnut spread fully. Swirl it in gently. This keeps the center soft and gooey.
Substitutions for Ingredients
– Dairy-Free Options: You can use almond milk, oat milk, or soy milk instead of regular milk. This keeps the cake moist and tasty.
– Alternative Sweeteners: For a healthier touch, try using honey, maple syrup, or coconut sugar. Adjust the amount based on sweetness preference.
Enhancing Flavor
– Adding Spices: A dash of cinnamon or nutmeg can boost the flavor. Just a pinch will add warmth.
– Experimenting with Mix-Ins: Try adding chocolate chips, nuts, or dried fruit. Each mix-in gives a new twist to the mug cake.
Pro Tips
- Choose the Right Mug: Use a 12-ounce mug to prevent overflow during cooking. A mug that’s too small may cause the batter to spill over in the microwave.
- Microwave Power Variations: Microwaves vary in power, so start with 40 seconds and check for doneness. If it’s still too wet, add 5-10 seconds as needed.
- Enhance Flavor: For a deeper chocolate flavor, use dark cocoa powder instead of regular cocoa powder. It will give your mug cake a richer taste.
- Serving Suggestions: Serve the mug cake warm with a scoop of ice cream or a drizzle of extra chocolate hazelnut spread for an indulgent treat!
Variations
Nut-Free Version
You can make a nut-free mug cake by using sunflower seed spread. This spread has a similar taste to chocolate hazelnut spread but is safe for those with nut allergies. Simply swap out the chocolate hazelnut spread in the recipe for the same amount of sunflower seed spread. You will still get that rich, creamy texture. Plus, it adds a nice twist to the flavor.
Gluten-Free Option
If you need a gluten-free mug cake, use gluten-free flour. You can find many types of gluten-free blends at stores. Just replace the all-purpose flour with gluten-free flour in the same amount. This change keeps your cake soft and fluffy. It’s a great way to enjoy a tasty treat without gluten.
Flavor Infusions
Want to amp up the flavor? Try adding coffee or espresso powder for a rich taste. Just mix in about 1 teaspoon with the dry ingredients. The coffee enhances the chocolate flavor and gives it a nice kick.
You can also experiment with different nut butters. Instead of chocolate hazelnut spread, try almond or peanut butter. Each nut butter brings its own unique flavor. This way, you can create many versions of this delightful mug cake.
Storage Info
Best Practices for Storage
Storing leftover mug cake is easy. Wait until it cools down. Then, cover it with plastic wrap. You can also use an airtight container. This helps keep it moist. Store it in the fridge for up to two days.
Reheating Instructions
Reheating your mug cake is quick. Use a microwave for this. Place the mug in the microwave. Heat it for about 10 to 15 seconds. Check if it’s warm enough. If not, heat it in small bursts. This keeps the cake soft and tasty.
Freezing Option
You can freeze single servings too. Allow the mug cake to cool completely. Wrap the mug tightly with plastic wrap. Then, place it in a freezer-safe bag. It can last for up to a month. When you want to eat it, thaw it in the fridge overnight. Reheat it as mentioned before. Enjoy your tasty treat anytime!
FAQs
How long does a mug cake take to cook in the microwave?
A mug cake cooks in the microwave for about 40 to 60 seconds. Cooking time may vary based on your microwave’s power. Watch for the cake to rise and set. It should be moist in the center for the best texture.
Can I use other types of flour for this recipe?
Yes, you can use other types of flour. Almond flour or oat flour works well. Just note that this may change the texture. You may need to adjust the liquid if you try a new flour type.
Is it safe to eat a mug cake made in the microwave?
Yes, it is safe to eat a mug cake made in the microwave. Cooking it for the right time ensures the batter is fully cooked. Just let it cool for a minute to avoid burns.
What can I serve with my chocolate hazelnut mug cake?
You can serve your mug cake with whipped cream, ice cream, or fresh berries. Chopped hazelnuts add a nice crunch too. A drizzle of chocolate syrup makes it even better.
Can I make this recipe in advance?
You can prepare the dry ingredients in advance and store them. When ready to eat, just add the wet ingredients and cook. This makes it easy for a quick treat anytime!
This blog post showed you how to create a tasty chocolate hazelnut mug cake. You learned about the simple ingredients and easy steps for making this treat. I shared tips for perfect texture and flavor variations. Storing and reheating your cake was also covered.
Remember, cooking should be fun and creative. Enjoy this quick dessert and make it your ow