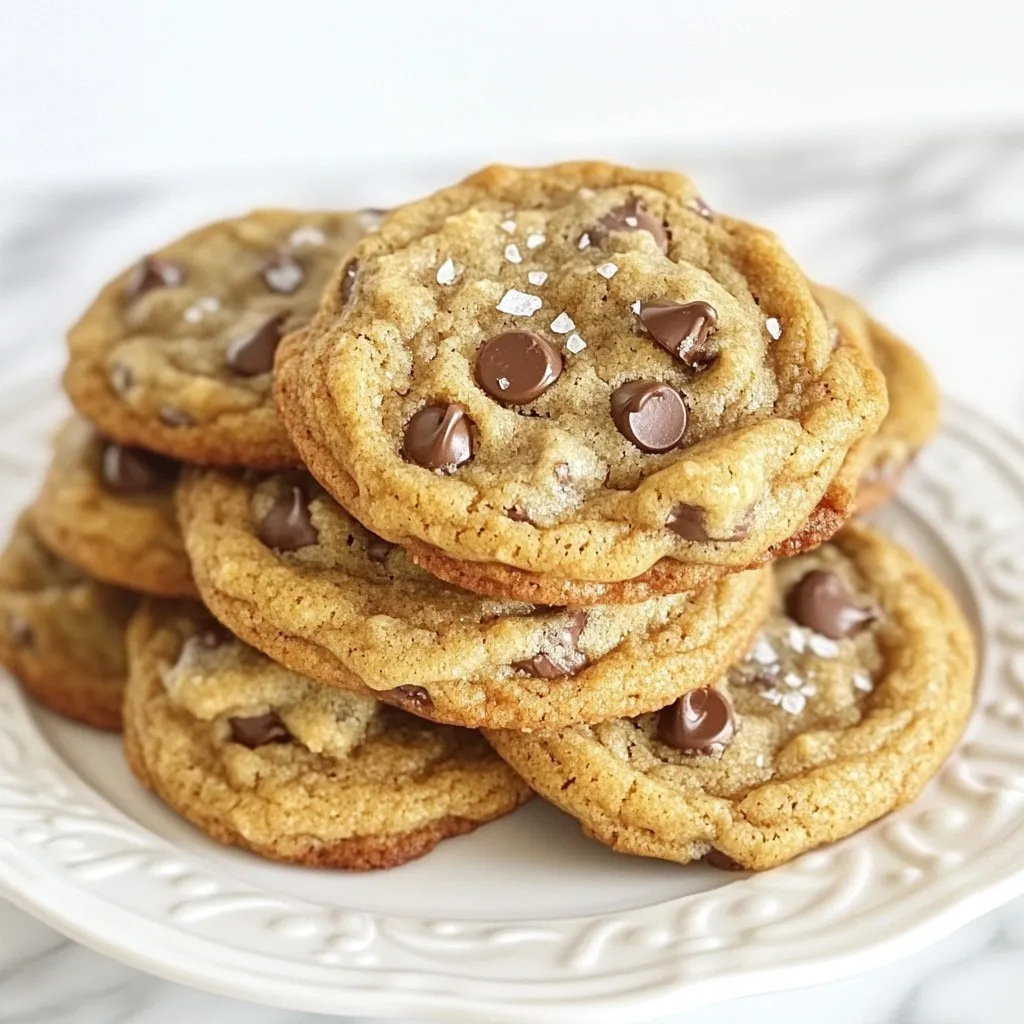
If you love warm, gooey cookies, you’ll crave my brown butter chocolate chip cookies. These treats have a rich, nutty flavor that makes each bite irresistible. I’ll guide you through every step, from browning the butter to baking the perfect cookie. Whether you’re a novice baker or a pro in the kitchen, this recipe delivers delicious results. Get ready to impress your friends and family with these amazing cookies!
Why I Love This Recipe
- Rich Flavor: The brown butter adds a nutty, deep flavor that elevates the classic chocolate chip cookie to a gourmet level.
- Perfect Texture: Chilling the dough ensures that the cookies have a chewy center and crispy edges, creating the perfect bite.
- Customizable: You can easily modify this recipe by adding your favorite nuts or swapping chocolate chips for other varieties.
- Great for Sharing: With 24 cookies per batch, this recipe is perfect for gatherings and makes a delightful treat for friends and family.
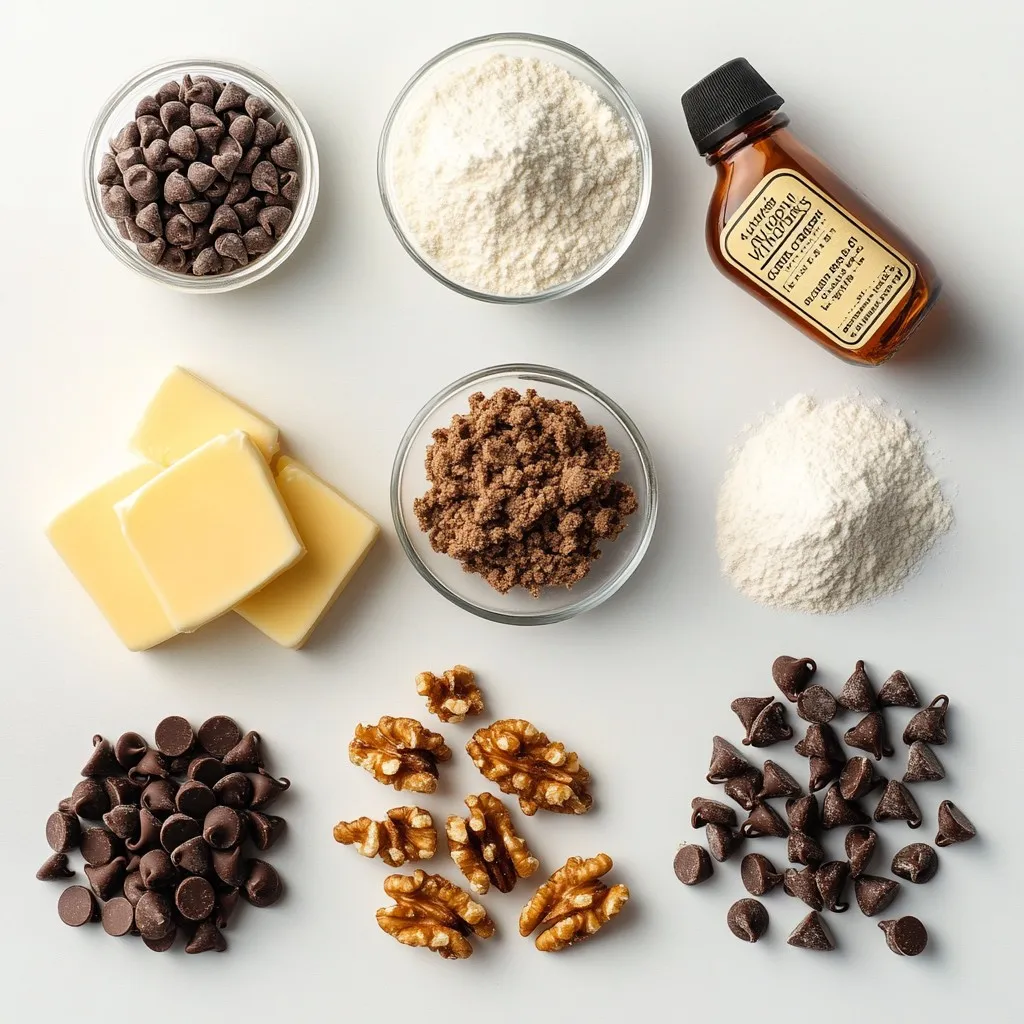
Ingredients
List of Ingredients
– 1 cup unsalted butter
– 3/4 cup packed brown sugar
– 1/4 cup granulated sugar
– 1 teaspoon pure vanilla extract
– 2 large eggs
– 2 1/4 cups all-purpose flour
– 1 teaspoon baking soda
– 1/2 teaspoon fine sea salt
– 1 cup semi-sweet chocolate chips
– 1/2 cup chopped walnuts (optional)
Ingredient Substitutions
Butter alternatives: If you want a dairy-free option, use coconut oil or vegan butter. Both can give a nice taste.
Sugar alternatives: Use coconut sugar or a sugar blend if you want less refined sugar. They can add a unique flavor.
Flour options: For gluten-free cookies, try almond flour or oat flour. Each will change the texture a bit but still taste great.
Using these substitutions, you can tailor the recipe to suit your needs and taste. Experimenting with different ingredients can lead to fun and tasty results!
Step-by-Step Instructions
Step-by-Step Cooking Process
– Brown the Butter: Start by melting the butter in a medium saucepan over medium heat. Stir as it melts. Watch for it to foam. Keep stirring until it turns a rich golden-brown color. This takes about 5-7 minutes. Once browned, remove it from heat to cool.
– Mix Sugars: In a large mixing bowl, add the browned butter, brown sugar, and granulated sugar. Use a hand mixer or stand mixer to beat them together on medium speed until smooth.
– Add Eggs and Vanilla: Next, add the eggs one at a time. Make sure each egg is mixed in well before adding the next. Then, stir in the pure vanilla extract until just combined.
– Combine Dry Ingredients: In a separate bowl, whisk the all-purpose flour, baking soda, and sea salt together. Slowly mix this dry mixture into the wet mix. Be gentle; overmixing can make the cookies tough.
– Fold in Chocolate Chips and Nuts: Use a spatula to carefully fold in the semi-sweet chocolate chips and chopped walnuts if you like. Make sure they are evenly spread throughout the dough.
– Chill the Dough: Cover the dough with plastic wrap. Refrigerate for at least 30 minutes to 1 hour. Chilling helps the flavors blend and improves the cookie texture.
– Preheat Oven: While the dough chills, preheat your oven to 350°F (175°C) about 10 minutes before you are ready to bake.
– Shape Cookies: Line a baking sheet with parchment paper. Use a tablespoon or cookie scoop to make dough balls. Place them a few inches apart on the sheet to give them room to spread.
– Bake: Bake the cookies in your preheated oven for 10-12 minutes. The edges should be golden, while the centers look slightly soft. Remember, they will firm up as they cool.
Cooking Times
– Prep Time: 30 minutes
– Total Time: 1 hour 30 minutes
Tips & Tricks
Perfecting the Dough
Chilling the dough is key to great cookies. This step helps the flavors bloom and the cookies spread less during baking. Always chill your dough for at least 30 minutes. This makes a big difference in taste and texture.
Next, avoid overmixing the dough. Mix just until you see no dry flour. Overmixing can make the cookies tough. You want a soft and chewy cookie, not a hard one!
Baking Tips
To ensure even baking, use a light-colored baking sheet. Dark sheets can cause the bottoms to brown too fast. Also, space the cookie balls at least two inches apart. This gives them room to spread.
For the best cookie texture, bake them until the edges are golden. The centers should still look soft. They will firm up as they cool. Take them out of the oven just before they look fully baked.
Presentation Tips
Serve these cookies warm with a cold glass of milk. They taste amazing this way! You can also arrange them on a pretty platter for a nice touch.
For an extra pop of flavor, sprinkle a pinch of flaky sea salt on each cookie. This contrast makes each bite even more delightful. Enjoy your warm cookies in style!
Pro Tips
- Brown Butter Mastery: Keep a close eye on the butter as it melts; it can go from perfectly brown to burnt in seconds. Stir constantly to achieve a rich, nutty flavor.
- Chilling is Key: Don’t skip the chilling step! It helps to solidify the fat in the cookies, which prevents them from spreading too much in the oven, resulting in a thicker cookie.
- Perfect Baking Time: Every oven is different, so start checking your cookies at the 10-minute mark. They should look slightly underbaked in the center for a soft texture.
- Storage Secrets: Store leftover cookies in an airtight container at room temperature. For longer freshness, you can freeze the dough before baking and bake them straight from the freezer!
Variations
Flavor Variations
You can make these cookies even more fun with a few simple changes.
– Peanut butter addition: To add a nutty twist, mix in 1/2 cup of peanut butter. It gives a rich and creamy taste that pairs well with chocolate. Just remember to reduce the butter slightly to keep the dough balanced.
– Using different types of chocolate: Swap semi-sweet chocolate chips for dark or milk chocolate chips. You can also mix in white chocolate chips for a sweet surprise. Each type adds its unique taste, making every batch special.
Dietary Variations
You can enjoy these cookies no matter your diet. Here are a couple of options to consider.
– Gluten-free options: Use a gluten-free flour blend to replace regular flour. Look for blends that include xanthan gum to help mimic the texture of wheat flour. This way, everyone can enjoy these cookies!
– Vegan adaptations: Replace butter with coconut oil and eggs with flax eggs (1 tablespoon ground flaxseed mixed with 2.5 tablespoons water). This creates a soft and chewy cookie without animal products. Enjoy these delicious treats, while keeping it plant-based!
Storage Info
Storing Cookies
To keep your cookies fresh, store them in an airtight container. This helps maintain their soft texture. You can layer cookies with parchment paper to prevent them from sticking together. For added freshness, place a slice of bread in the container. The cookies will absorb moisture from the bread, keeping them soft.
Recommended Containers
Use glass jars or plastic bins for easy access and storage. Make sure the containers seal tightly. If you want to display your cookies, a clear glass jar looks nice on the counter. Just remember to keep the lid on when not serving. This way, your cookies stay delicious for days!
Freezing Cookies
To freeze your cookie dough, scoop it into balls. Place these balls on a baking sheet lined with parchment paper. Freeze them for about an hour, then transfer them to a zip-top bag. This method saves space and helps keep the dough fresh.
Thawing and Baking Frozen Cookies
When ready to bake, simply pull out the desired number of cookie balls. Let them thaw on the counter for about 10-15 minutes. Then, bake as directed in the recipe. You might need to add a minute or two to the baking time. Enjoy fresh cookies anytime with this simple freezing method!
FAQs
What makes brown butter special?
Brown butter adds a deep, nutty flavor to your cookies. It enhances the taste and aroma, making each bite warm and inviting. The process of browning butter turns the milk solids golden and releases rich, complex flavors. This simple step turns ordinary cookies into extraordinary treats.
Can I use a different type of sugar?
Yes, you can use different sugars! Using only brown sugar will give you chewier cookies. If you prefer a lighter taste, use white sugar alone. You could also mix different sugars for unique flavors. Each choice will change the cookie’s texture and taste.
How do I know when the cookies are done baking?
Your cookies are done when the edges turn golden, and the centers look slightly soft. They will continue to cook on the baking sheet after you take them out. This way, you get soft, chewy cookies. Don’t wait too long; you want them to stay moist!
How long can I store these cookies?
You can store the cookies in an airtight container for up to one week. If you want them to stay fresh longer, place them in the fridge. For even longer storage, you can freeze them for up to three months. Just let them cool completely before storing.
Can I double the recipe?
Yes, you can double the recipe without issues! Just make sure you have enough space for all the cookies. Use larger bowls for mixing and baking sheets for baking. Enjoy sharing the extra cookies with friends and family!
You now have a solid recipe for delicious cookies. We covered the key ingredients, easy steps, and helpful tips. Remember to chill the dough for the best texture. Feel free to try different flavors or variations. Store any extras in a cool place, or freeze for later. Enjoy baking and sharing these treats with friends and family. Happy bakin